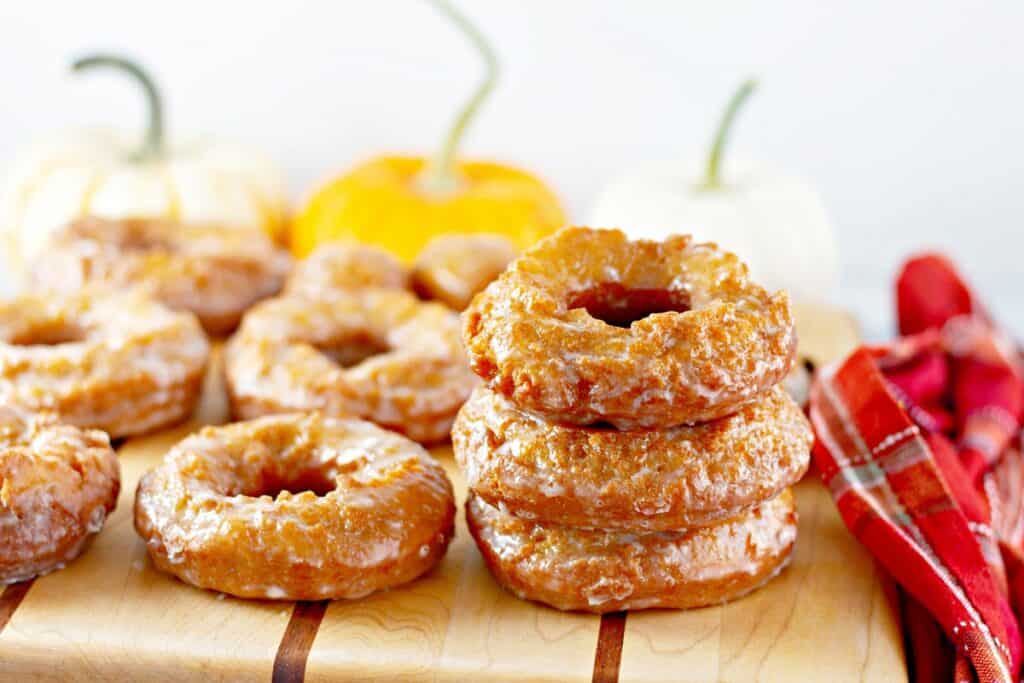
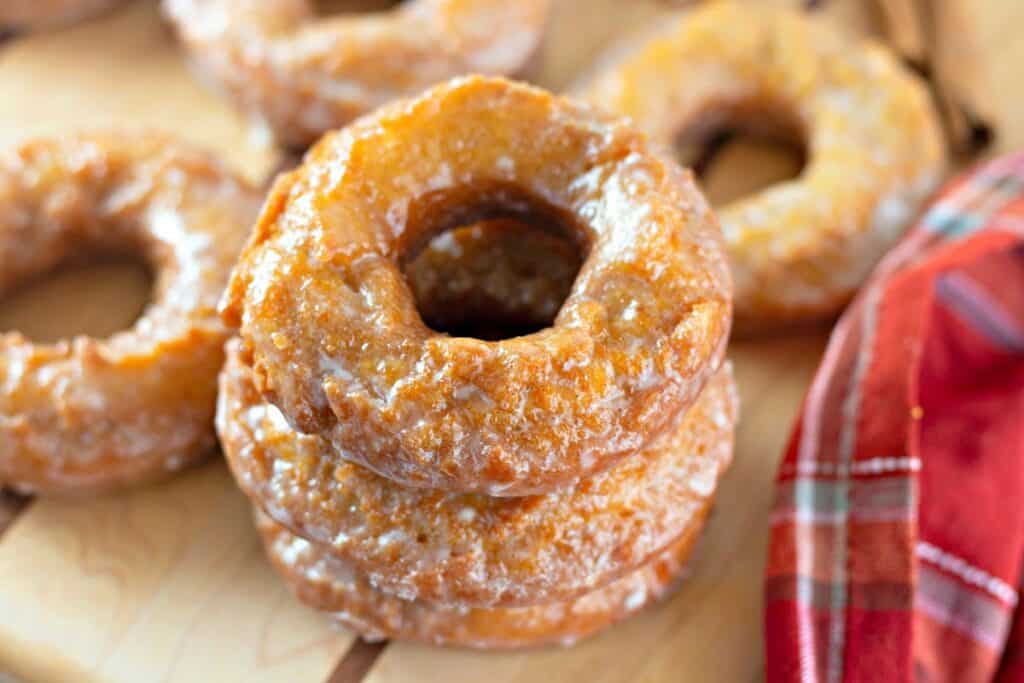
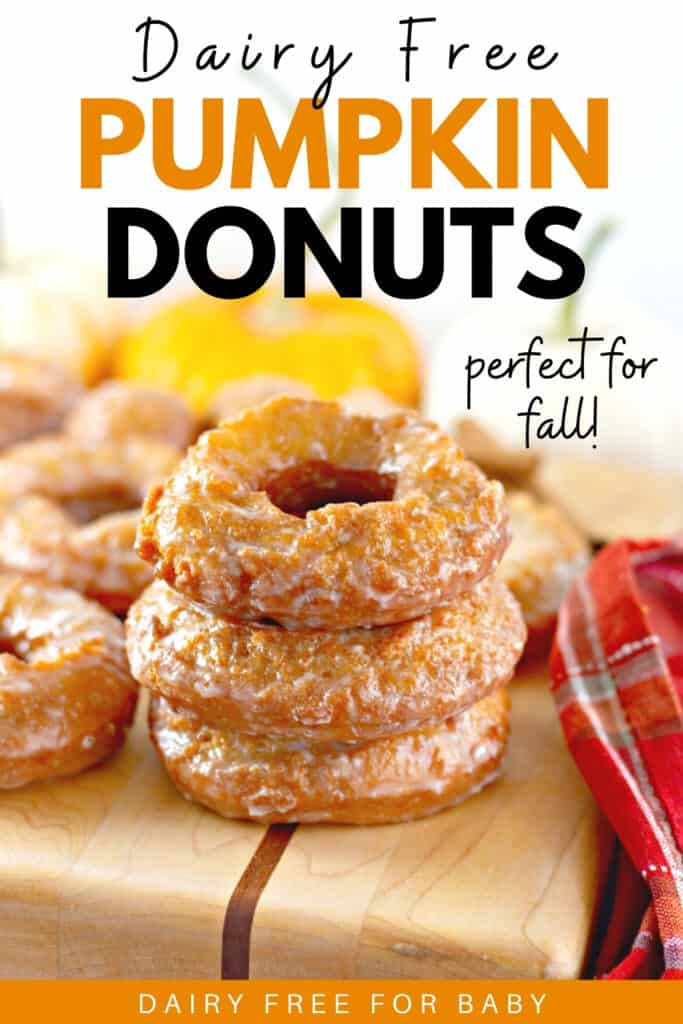
Craving a tasty pumpkin dessert this fall? Try these old fashioned dairy free pumpkin donuts! A traditional cake-like donut batter is fried and then glazed to create the ultimate sweet treat. A slightly crisp and sugary exterior is complimented by the tender, pumpkin-flavored interior. Bake up a batch for weekend brunches or desserts!
Ingredients
This recipe calls for pretty common baking staples (which you’ll find a full list of in the recipe card). Here are a few notes about selected ingredients:
- Pumpkin puree – You’re looking for plain canned pumpkin puree. Since we’ll sweeten the recipe and add pumpkin spice, avoid the canned pumpkin pie filling that’s already sweetened and seasoned.
- Oat milk – I like using oat milk as an ingredient in many baked goods thanks to its slightly sweet flavor. However, you can use pretty much any dairy-free milk in place of it, so don’t feel obligated to go to the store just to grab this. Almond milk, soy milk, Ripple, and any of the other alternatives will all work fine.
- Dairy free butter – Country Crock plant butter sticks or Earth Balance sticks/tub are the best options for this recipe.
Step by Step Instructions
You’ll find full recipes and ingredients in the recipe card at the bottom of this post, but here’s a helpful overview with photos.
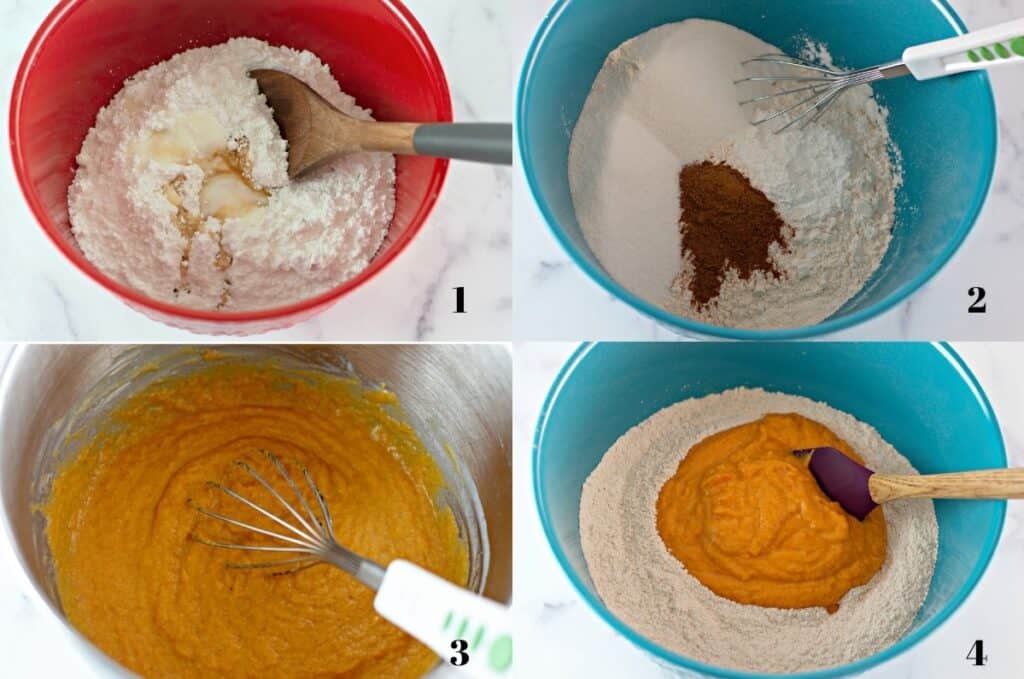
Start by preparing your glaze – you’ll mix together powdered sugar, oat milk, and vanilla (photo 1).
Next, in a large mixing bowl, combine the dry ingredients – the flour, baking powder, salt, and pumpkin spice (photo 2).
In a separate bowl, mix together the pumpkin puree, oat milk, eggs, sugar, dairy free butter, and vanilla (photo 3). Then mix this with the dry ingredients (photo 4).
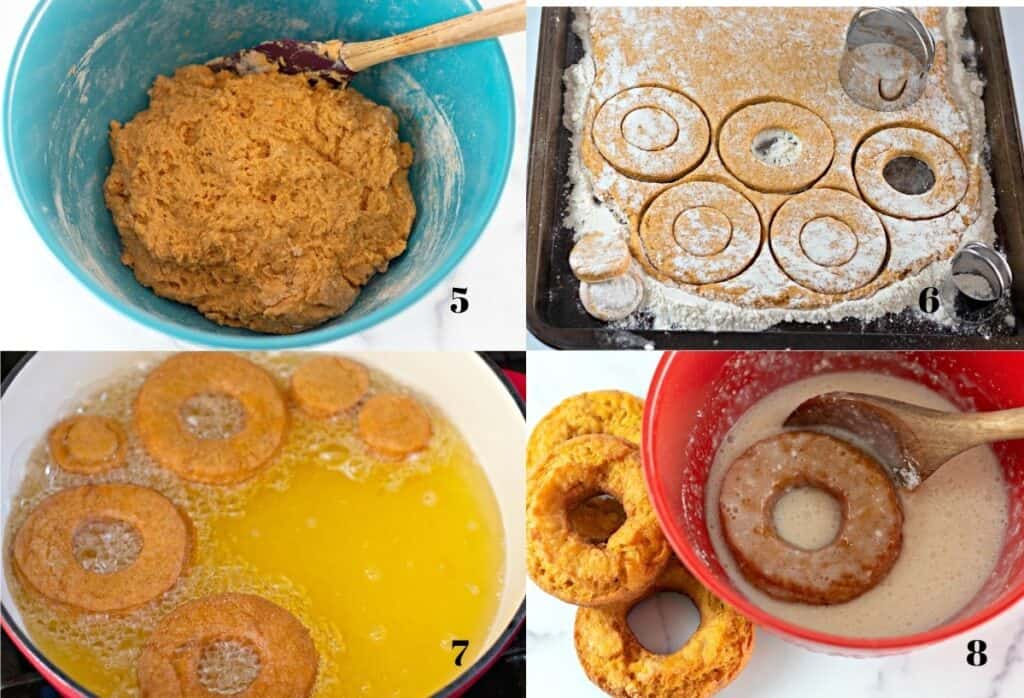
The dough should be thick and sticky (photo 5). Place this on a well-floured surface, add a little extra flour on top, and pat it out to about ¼- to ½-inch thick. Then use a biscuit cutter or donut cutter to cut these into circles. I usually use a biscuit cutter and just form a hole with my finger, but if you do have a donut cutter you can make little donut holes too (photo 6). Don’t worry about them looking too thin; these rise a lot when they are put into the oil!
Then you’ll heat oil in a large pot or sauté pan, filling it about 3 inches high with oil. Because the dough is pretty soft, you can use a slotted spoon or metal spatula to carefully low it into the oil if you need to. I find it easy enough to lower in by hand, but you do need to be cautious doing it this way so as not to stretch out the donut too much or burn your hand.
Once the donuts are in the oil, you’ll cook for a few minutes on each side (photo 7). I recommend using long tongs to easily flip the donuts without the risk of splattering oil on your hand.
Last step is to remove the donuts, let them dry for a moment, then dip the still-warm donuts in the glaze (photo 8). Place them on a wire rack set over a baking sheet to allow any excess glaze to drip off. Then go ahead and dig in!
Recipe FAQ
Here are some common questions that may come up as you prepare these dairy free pumpkin donuts:
The batter should be thick and still a little sticky. You should be able to pour it out onto a floured surface, sprinkle more flour on top, pat the batter down, and cut it into circles. The circles should stay together when gently picked up by hand or with a slotted spoon. It is normal for it to be a bit fragile, though.
The most common reason for this is that the flour was packed down when measuring it. Spoon and level flour to measure.
Slight mismeasurements in flour or liquid ingredients may cause this to happen. Add 2 tablespoons to ¼ cup of flour more, and you should be able to pour it out onto a floured surface to cut into circles.
Donuts are best enjoyed the day you make them, but you can store them in an air tight container at room temperature for up to 1-2 days.
Allergens in this recipe
As written, this recipe is dairy free.
Depending on your choice of butter, this recipe can easily be made nut free as well. Just choose a dairy-free butter that does not contain nuts.
This recipe does contain wheat/gluten (in the flour) and soy (in the vegetable oil for frying). Here are suggested modifications:
- To make soy free: Use another oil for frying. I recommend avocado oil, as it has a high smoke point. Also, double check that your dairy free butter does not contain soy.
- To make gluten free: Use a 1:1 gluten free all-purpose flour rather than regular all-purpose flour. Note that the dough will be softer and more fragile this way, so use a spoon to lower the donuts in and carefully flip them. Also, double check that your powdered sugar does not contain gluten (very rarely, wheat starch may be added as an anti-caking agent).
More Dairy Free Pumpkin Treats
If you’re craving more dairy free pumpkin recipes, don’t you fret – here are a few of my recommendations:
- 3 ingredient pumpkin muffins – legit the easiest muffin you can imagine making!
- Dairy free pumpkin dip – This simple dip tastes great with sliced apples or ginger snap cookies.
- Pumpkin chocolate chip cookies – These are both dairy free and vegan, and have that classic pumpkin and chocolate combination.
- Pumpkin fluff ice cream pie – A yummy freezer pie that the whole family will love!
I hope you enjoy these dairy free donuts – they’re always a wonderful treat for my family! If you get a chance to try them, feel free to leave a recipe rating or comment below.
Dairy Free Pumpkin Donuts
Ingredients
For the glaze:
- 3 cups powdered sugar
- ½ cup oat milk
- 1 teaspoon vanilla extract
For the donuts:
- 3 cups all-purpose flour
- 1 tablespoon baking powder
- ½ teaspoon salt
- 2 teaspoons pumpkin spice
- ¾ cup granulated sugar
- ¾ cup pumpkin puree
- ⅓ cup oat milk (or another dairy-free milk alternative)
- 2 large eggs
- 2 tablespoons melted dairy free butter
- 1 teaspoon vanilla extract
For frying:
- Vegetable oil
Instructions
-
Place a wire rack over a baking sheet and set aside for now.
-
Prepare the glaze in a mixing bowl by combining the powdered sugar, oat milk, and vanilla extract. Set aside for now.
-
In a large mixing bowl, combine the flour, baking powder, salt, and pumpkin spice.
-
In a separate mixing bowl, combine the sugar, pumpkin puree, oat milk, eggs, dairy free butter, and vanilla extract. Whisk together well, then pour into the dry ingredients.
-
Stir the ingredients together until combined. The dough will be thick and sticky. Pour the dough out onto a well-floured surface and sprinkle a little more flour to the top of it. Pat down by hand until about ¼- to ½-inch thick (the donuts will rise when frying). Use a donut or biscuit cutter to cut out circles (poke a hole in the center using your finger if using the biscuit cutter).
-
Pour oil into a pot until it’s about 3 inches high. Heat over medium heat. When the oil is hot, place the donuts into the pot. You may want to use a slotted spoon to slide the donuts in, as the dough will be a bit soft. Add up to 3 donuts at a time without crowding the pot (usually 3 can fit at one time in a large pot).
-
Cook for 2 to 3 minutes until lightly browned on the bottom, then flip with tongs and cook for another 1 to 2 minutes until lightly browned on the other side.*
-
Remove the donuts with the tongs and place on a wire rack. Take the warm donuts and dip in the glaze on both sides, then return to the wire rack to continue cooling and let any excess glaze drip off.
-
Repeat this process in batches until all the donuts are cooked through and glazed. Enjoy!
Recipe Notes
- *Timing for the oil is just a guideline; this can vary based on how well your stove controls heat. A gas stove is easier to control than electric. Use the browning as an indicator; if the donuts are still a light orange color, they need more time; if they’re a dark brown, they need less time.
- This recipe makes 12-13 donuts using a biscuit cutter and no donut holes. If you are using a donut cutter with donut holes, it may come out closer to 10-12 full size donuts.
- Nutrition analysis below is approximate; it assumes 10% of the oil is absorbed, and assumes around 4 cups of oil for frying (but this is just an estimate, it may be more or less). It also assumes all the glaze is used; if less is used, calories and sugar will be less.
Nutrition facts (approximate per donut, assumes 12 donuts): 390 calories, 10.5 g fat, 2.5 g saturated fat, 260 mg sodium, 70 g carbohydrate, 1.5 g fiber, 42.5 g sugar, 5 g protein, Vitamin D: 2%, Calcium: 8%, Iron: 12%, Potassium: 2%
Share: What’s your favorite dairy free pumpkin treat? If you tried these donuts, what did you think?
Feel free to pin this post to share with others!
Hi! can I pour the batter into silicon donut tray instead or will it not work as well??
Hi! I wouldn’t recommend a silicone tray for this recipe as you don’t get the same slight crispness as you do with frying. If you bake in a silicone tray, they may be more cake like and soft – though you’re welcome to try it and report back on how it goes 🙂