
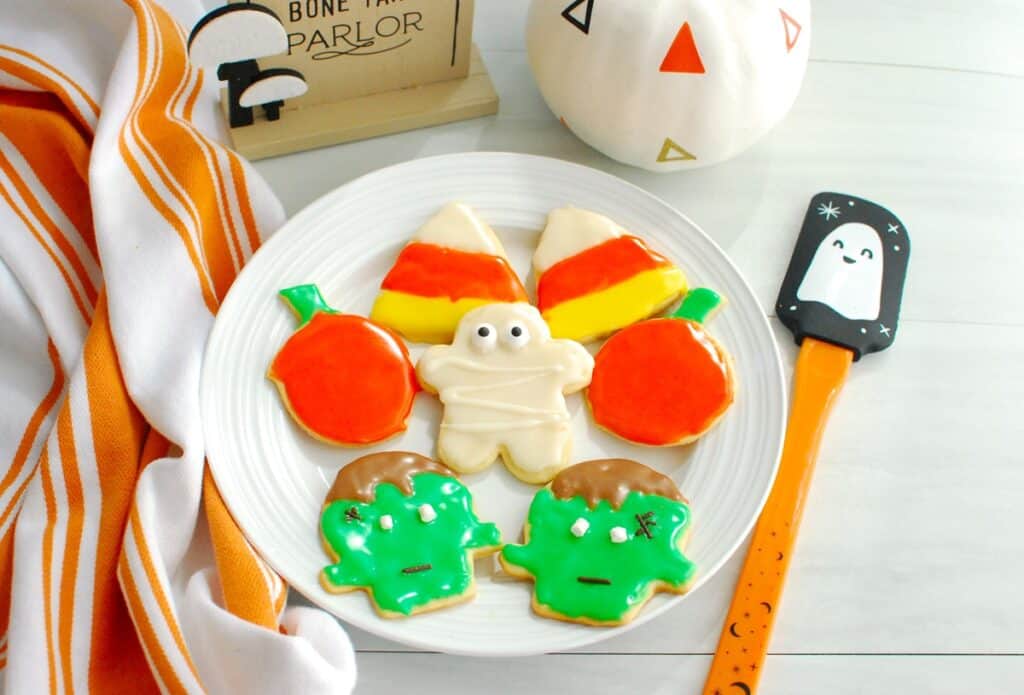
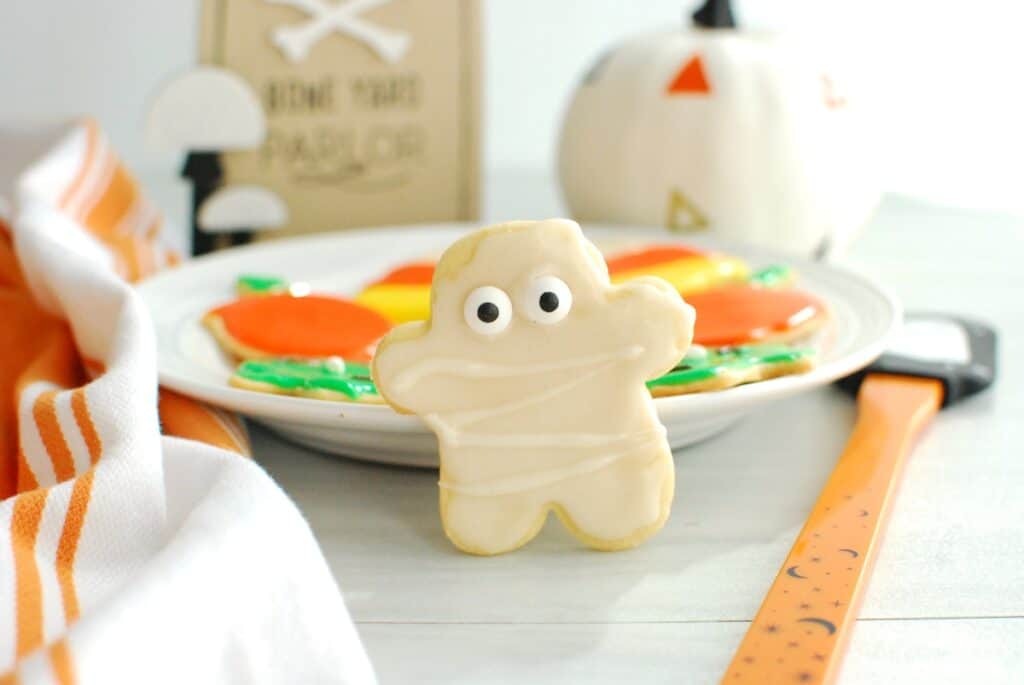
There’s something about Halloween that just begs for fun seasonal treats! This batch of dairy-free Halloween sugar cookies is perfect for some spooky fun. The cookies are soft with light crisp edges. An easy powdered sugar icing recipe (with no corn syrup) is included too – great for decorating. Use whatever cookie cutters you have on hand (confession: I used Christmas ones that I turned into Halloween shapes, haha) and whip up pumpkins, candy corn, mummies, and more.
Ingredients
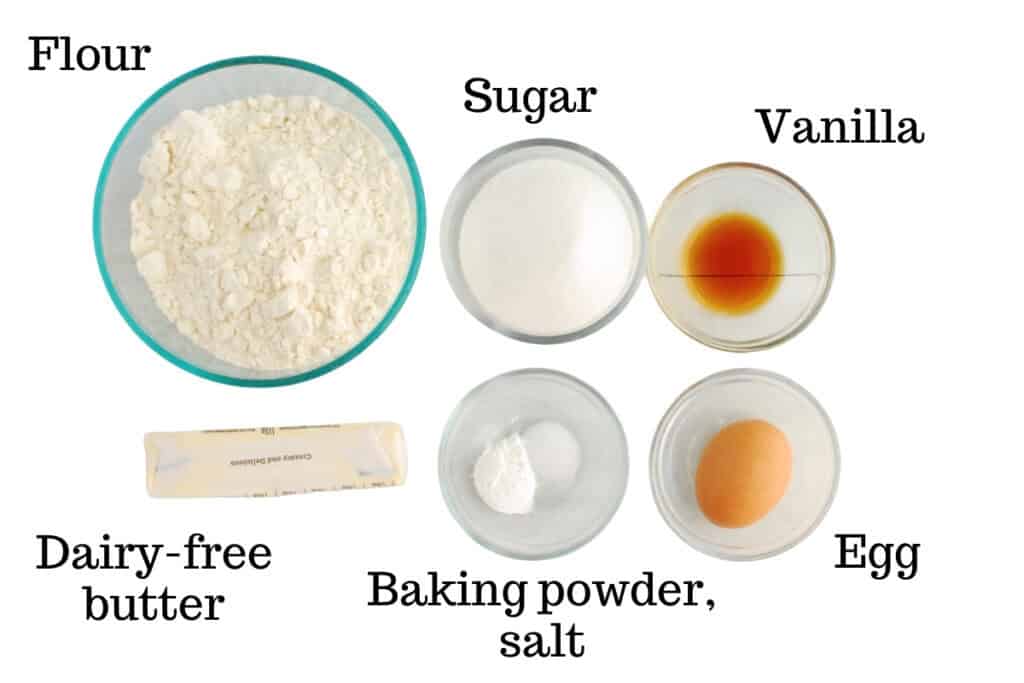
Here’s a photo of all the ingredients you’ll need for the cookies:
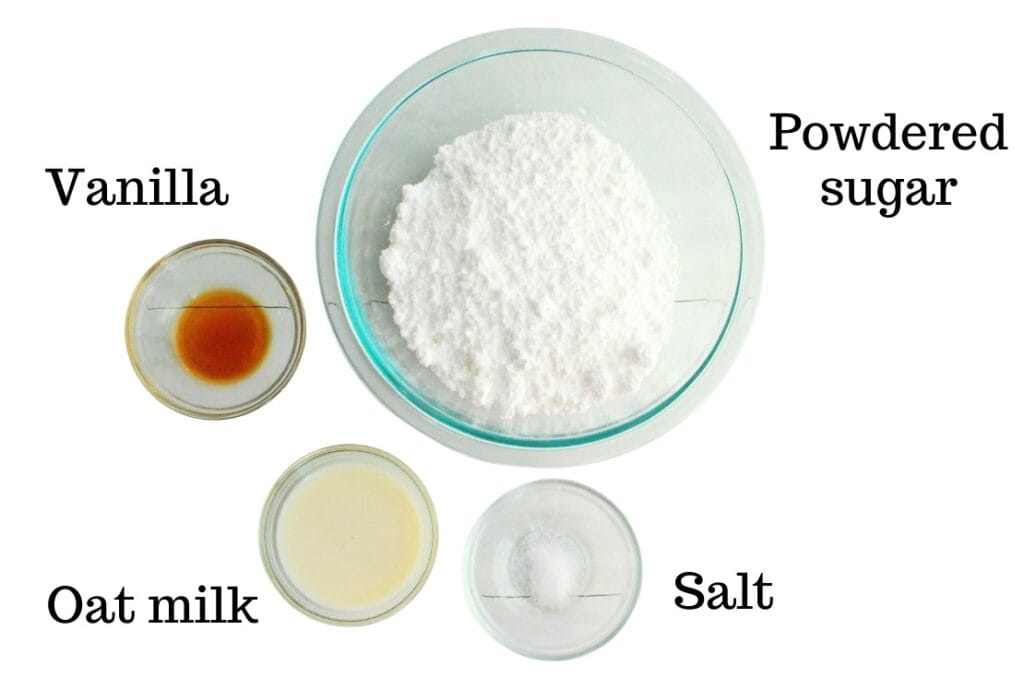
And here’s what you’ll need for the icing (plus food coloring if you want to make fun themed cookies):
Because most of these are standard pantry or fridge ingredients, the only ingredient I want to call out with some product suggestions is the dairy-free butter.
Country Crock plant butter sticks with avocado oil or the Country Crock salted plant butter for baking both work very well in these cookies. If you need a soy-free option, Earth Balance soy free sticks are a good choice. It is important to choose a good dairy-free butter for this recipe; some of the tub-based options will not work because they have too high of a moisture content.
Instructions
You’ll find the full recipe instructions in the recipe card below, but here’s a helpful overview with photos and tips. Making the cookies themselves is quite easy!
Start by mixing together the flour, baking powder, and salt.

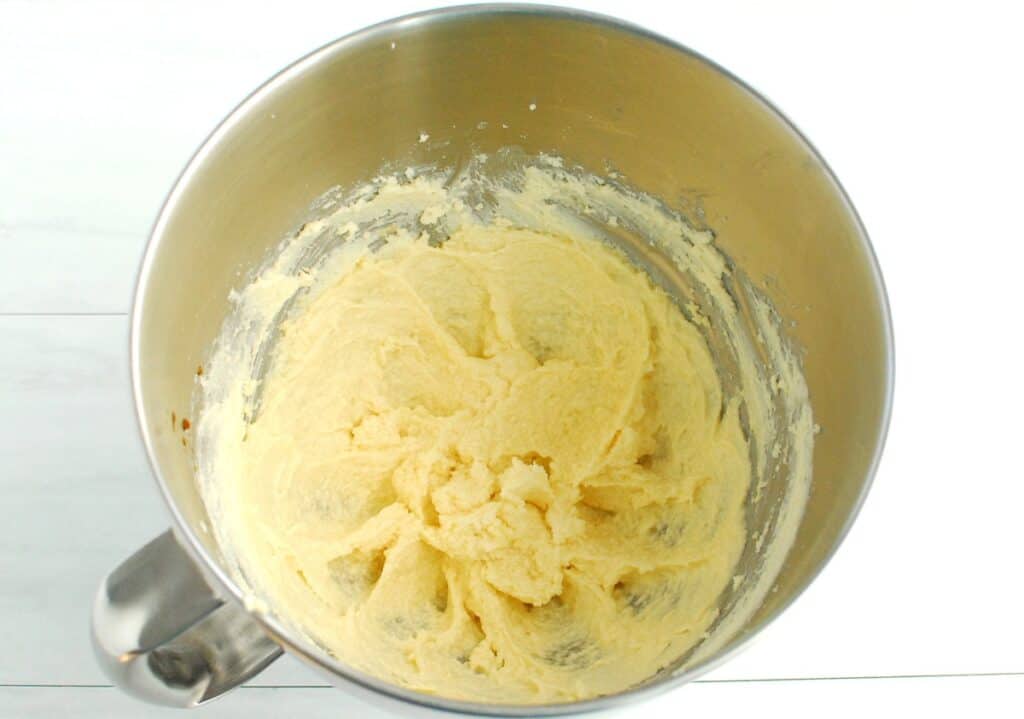
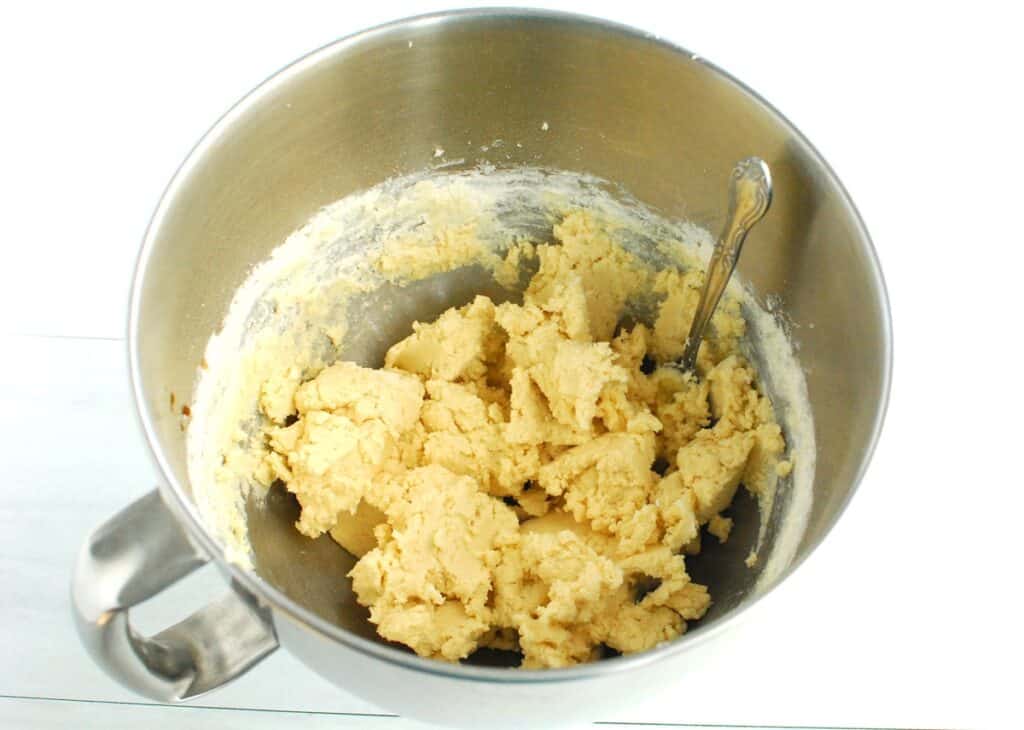
In another large bowl, cream together the dairy-free butter and sugar, then add the egg and vanilla.
Pour the dry ingredients into the wet ingredients, and stir until combined.
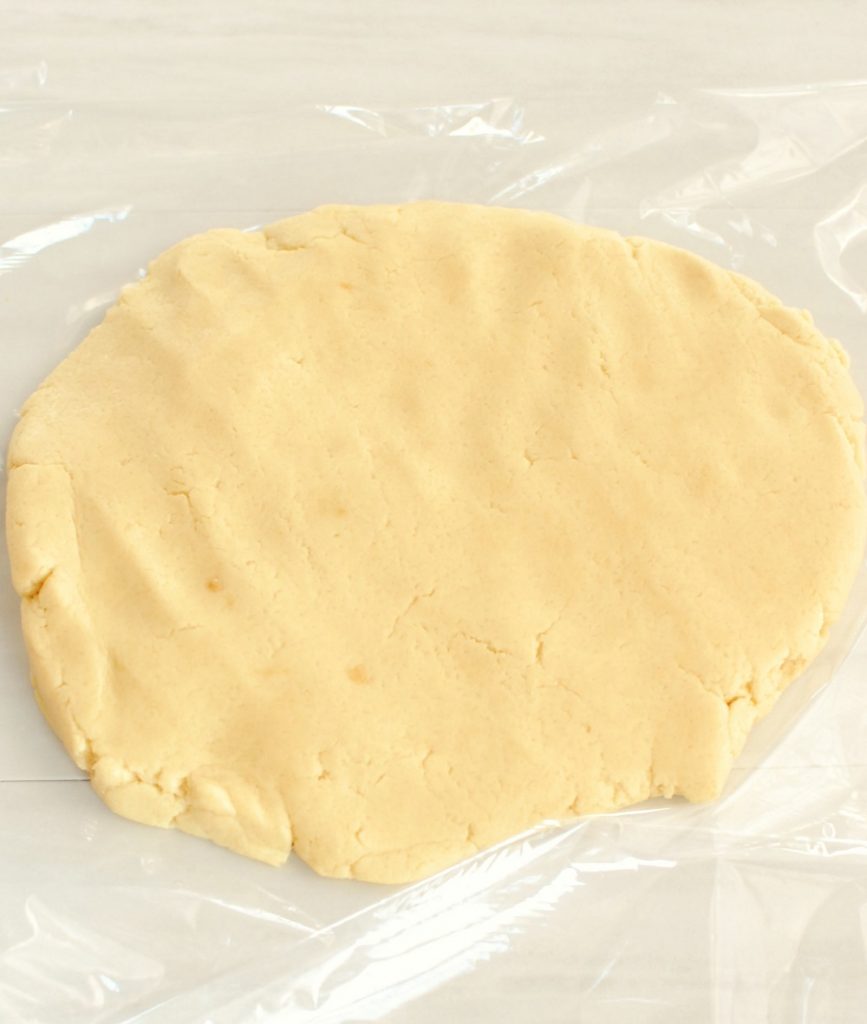
Pat that into a disc, wrap in plastic wrap, and chill for at least 30 minutes.
Meanwhile, preheat the oven and get your baking sheets ready.
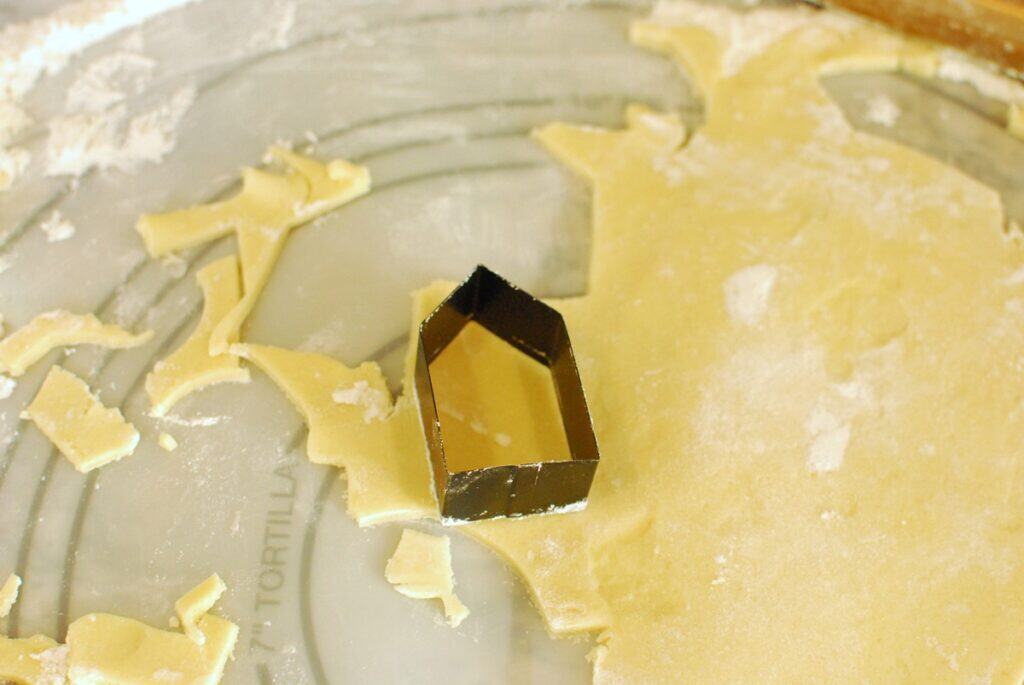
When the dough is chilled, remove it onto a large floured surface and roll the dough out. Aim for rolling the dough about ¼-inch thick. If you like a crispier cookie, you can roll a little thinner.
Use cookie cutters to cut out your cookies.
Bake ‘em for about 8-10 minutes. Smaller, thinner cookies will require less time; larger, thicker cookies will require more time – but it’s a good idea to start checking all of them around 8 minutes just in case.
After the cookies bake, let ‘em cool. You can make the icing while you’re waiting.
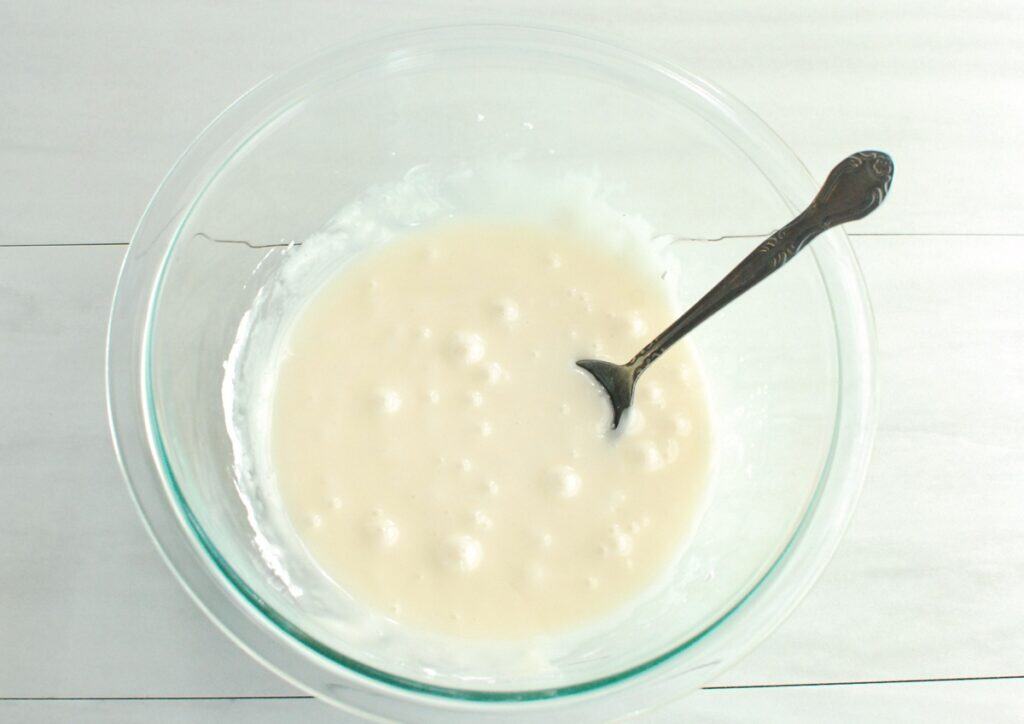
Combine the powdered sugar, oat milk, vanilla, and salt. The icing can be adjusted if it doesn’t seem to have the right thickness (which can sometimes happen depending on how packed the measuring cup is for the powdered sugar). If it seems too thin, add a little extra powdered sugar. If it seems to thick, add another small splash of oat milk.
You can divide the icing up into several small bowls, and add food coloring in the colors you need. Then go ahead and have fun decorating! Decorating is not my strong suit – haha – but I think I did a pretty good job with this batch.
Helpful Tips
- Powdered sugar icing will *not* harden enough for these cookies to be stackable. It will solidify and hold its shape on the cookie, but if pressed in a stack of cookies, it can become smushed. If you want stackable cookies, use a royal icing with corn syrup instead.
- Using a toothpick can help you to spread the icing and form certain shapes when you’re decorating.
- If you like a hint of traditional almond flavor in your icing, add a quarter teaspoon of almond extract to the icing ingredients.
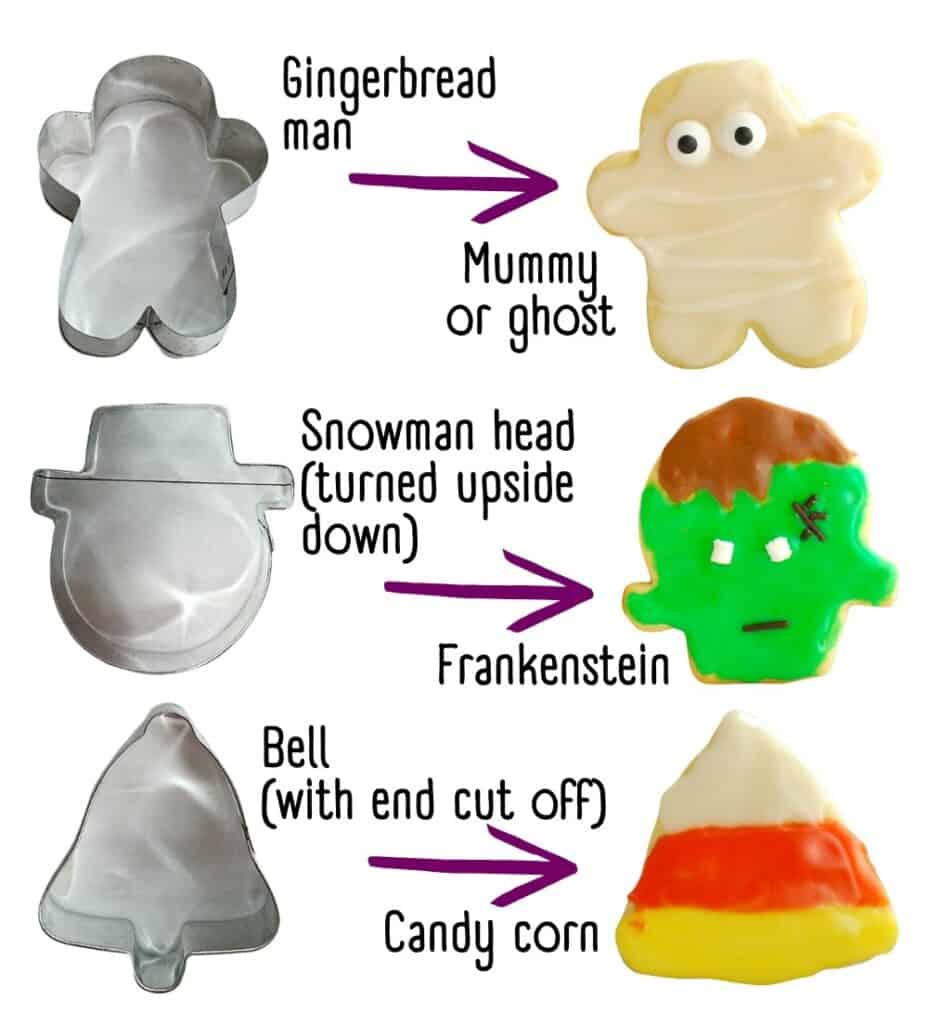
- If you don’t have Halloween cookie cutters, you can make do with some of your Christmas ones, like I did! A snowman cookie cutter flipped upside down works for Frankenstein cookies; a gingerbread cookie cutter can be made into a mummy; an ornament can be turned into a pumpkin; and a bell with the end cut off can form a triangle for candy corn.
Allergens in this Recipe
Disclaimer: Always double check ingredients and labels yourself prior to making a recipe. While I try to check all ingredients for allergens, there’s always the chance I may miss something, or manufacturer formulations can change.
As written, this recipe is dairy free. As long as there are no nuts in the dairy-free butter or milk alternative used, this recipe is also nut free.
This recipe does contain wheat/gluten (in the flour), eggs (in the egg), and soy (in the dairy-free butter, if using the option I recommend). Here are some possible substitution ideas:
- To make wheat/gluten free: Use a gluten-free all-purpose flour blend in place of the regular flour, and double check that your oat milk is gluten-free.
- To make egg free: I haven’t tested substitutions for this recipe, so I can’t guarantee this would work – but if I were testing it, I’d try 1 tbsp milk alternative + ½ tbsp cornstarch + ¼ tsp extra baking powder.
- To make soy free: Use dairy-free soy-free butter, like Earth Balance soy free sticks.
More Dairy Free Halloween Recipes
If you’re looking for more fun Halloween recipes for a dairy free diet, be sure to give one of these a try:
- Chocolate pumpkin crinkle cookies
- Mummy hot dogs
- Dairy free Halloween cookie cake
- Halloween monster muffins
- Dairy free Halloween snack board
I hope you enjoy this recipe! If you get a chance to try it, please leave a recipe rating or comment below.

Dairy Free Halloween Sugar Cookies
Ingredients
For the cookies:
- 1 ½ cups all-purpose flour
- ½ teaspoon baking powder
- ¼ teaspoon salt
- ½ cup dairy-free butter (1 stick; i.e. Country Crock plant butter with avocado oil)
- ½ cup granulated sugar
- 1 large egg
- 1 teaspoon vanilla extract
For the icing for decorating (optional):
- 1 ¾ cups powdered sugar
- 3 tablespoons oat milk (or any milk alternative)
- 1 teaspoon vanilla extract
- ¼ teaspoon salt
- Food coloring
Instructions
-
In a mixing bowl, combine the flour, baking powder, and salt.
-
In another large mixing bowl, cream together the dairy-free butter and granulated sugar using a stand mixer or hand mixer. Add the egg and vanilla and mix until well combined.
-
Add the dry ingredients to the wet ingredients and stir until combined.
-
Form the dough into an eight-inch disc, and wrap in plastic wrap. Chill in the fridge for at least 30 minutes.
-
Meanwhile, preheat the oven to 350 degrees F. Line two baking sheets with parchment paper.
-
On a lightly floured surface, roll out dough (roll to about ¼-inch thick, or slightly thinner if you want a crispier cookie) . Use a cookie cutter to cut out shapes. Place on the prepared baking sheets.
-
Bake at 350 degrees F for 8-10 minutes, or until edges just start turning a light golden brown. Let cool on the pan for 5-10 minutes, then remove to a cooling rack to continue cooling.
-
Meanwhile, prepare the icing (if using). Combine the powdered sugar, oat milk, vanilla, and salt. Stir. The consistency should be thin enough to spread over the cookies, but thick enough that it doesn’t run off of them. (See notes for adjustments). Divide into small bowls and mix with food coloring.
-
When the cookies are cool, use the icing to decorate them as desired. Let the icing solidify a bit before adding additional colors on top of a base layer. Enjoy!
Recipe Notes
- The cooking time can vary slightly depending on the thickness of the dough and the size of the cookie cutters. Thicker, larger cookies will take longer than thinner, smaller cookies. Regardless, start checking at 8 minutes.
- The specific yield will depend on the size of the cookie cutters. You’ll get a greater number of cookies with a smaller cookie cutter, or a smaller number with large cookie cutters.
- The icing can be adjusted if it doesn’t seem to have the right thickness when made above (which can sometimes happen depending on how packed the measuring cup is for the powdered sugar). If it seems too thin, add a little extra powdered sugar. If it seems to thick, add a small splash of oat milk.
- Powdered sugar icing will *not* harden enough for these cookies to be stackable. It will solidify and hold its shape on the cookie, but if pressed in a stack of cookies, it can become smushed. If you want stackable cookies, use a royal icing with corn syrup instead.
Nutrition analysis (approximate per cookie with icing): 118 calories, 4 g fat, 2 g saturated fat, 100 mg sodium, 19 g carbohydrate, 0 g fiber, 13 g sugar, 1 g protein, Vitamin D: 0%, Calcium: 1%, Iron: 3%, Potassium: 0%
Please pin this post to save for later and share with others. 🙂

Worked perfectly and tasted great!
Glad you enjoyed it!