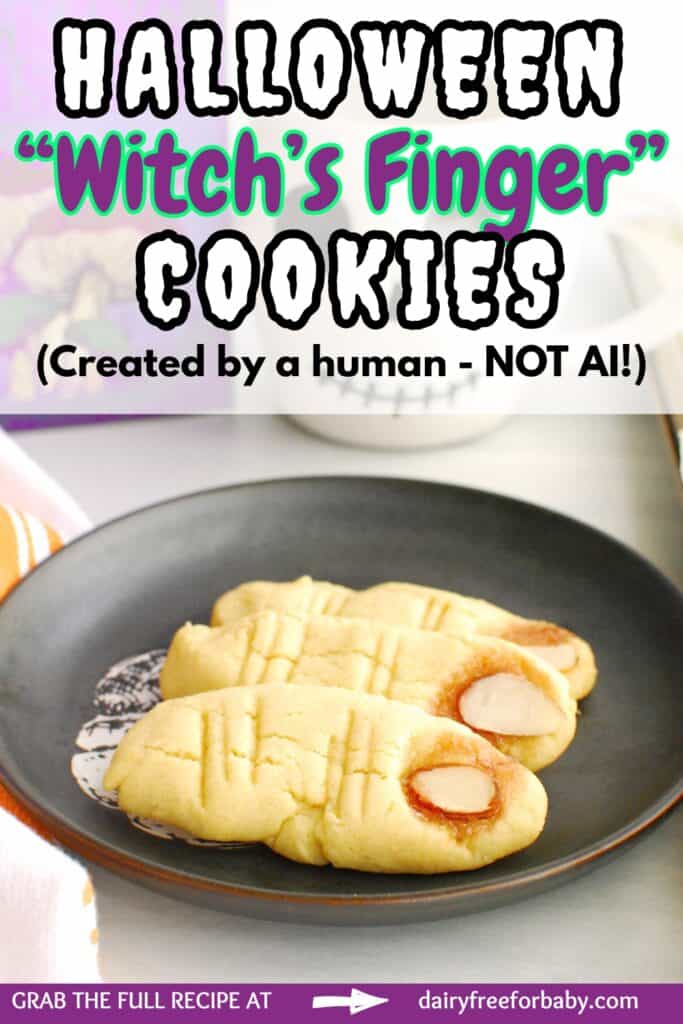
Some Halloween treats are cute and festive, and some are silly and spooky. These Halloween finger cookies definitely lean into the latter camp, and make a great option for a party or treat for your kiddo. Made with olive oil instead of butter, these are naturally dairy free. And I love that they use simple pantry ingredients but still taste amazing and look festive!
Ingredient Notes
Here’s a photo of all the ingredients you’ll need, along with selected ingredient notes:
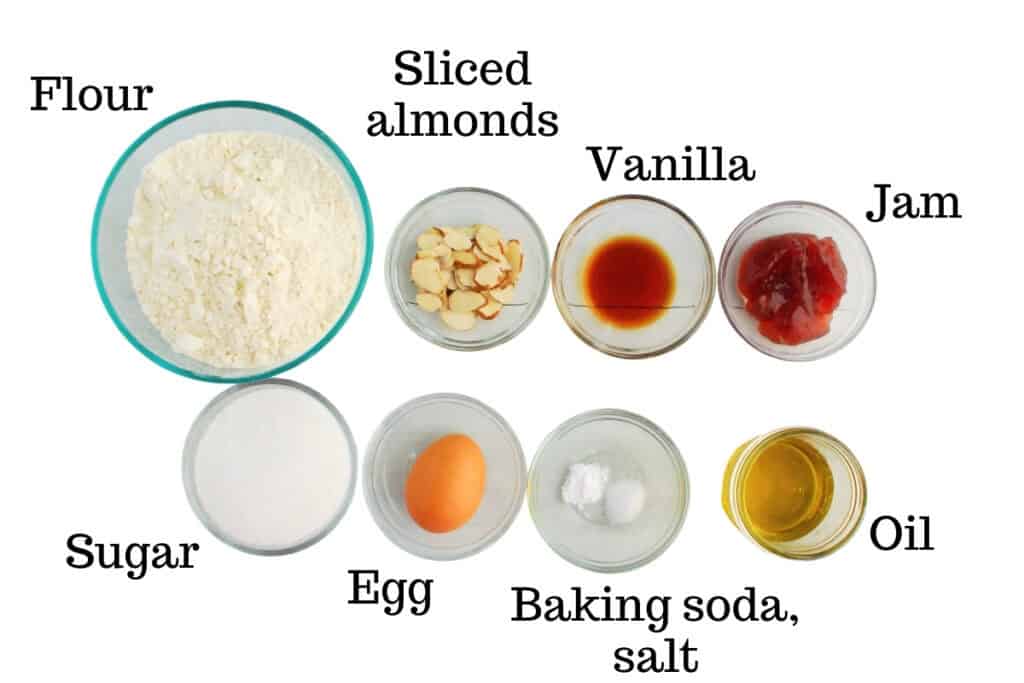
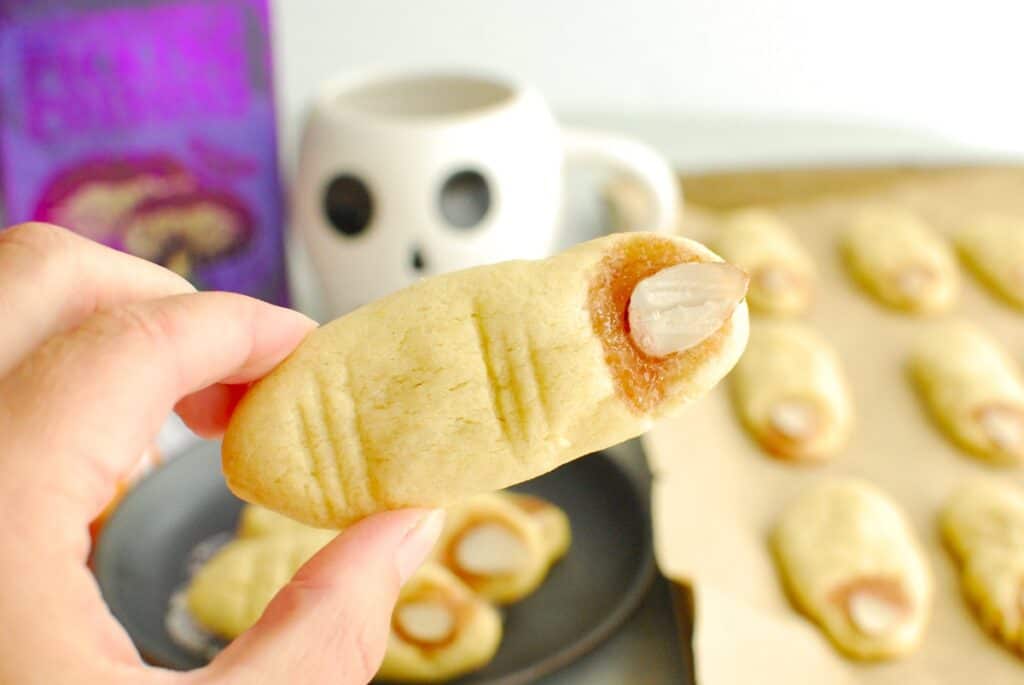
- Jam – You’ll use a little bit on the ends of the cookies to hold the almond “nail” in place. You can also spread a little on the opposite side of the finger if desired, to make it look bloody at the end. I didn’t do this for my batch but you definitely could. I used raspberry jam, but strawberry or cherry also works well.
- Sliced almonds – These are used to create the fingernail on the cookie. If you have a nut allergy (or are making these for a classroom with nut allergies), you can substitute this for broken banana chips, dried fruit, shaved coconut strips, pumpkin seeds, or pieces of a flake cereal.
Instructions
You’ll find the full recipe amounts and instructions in the recipe card below, but here’s a helpful overview with photos and tips.
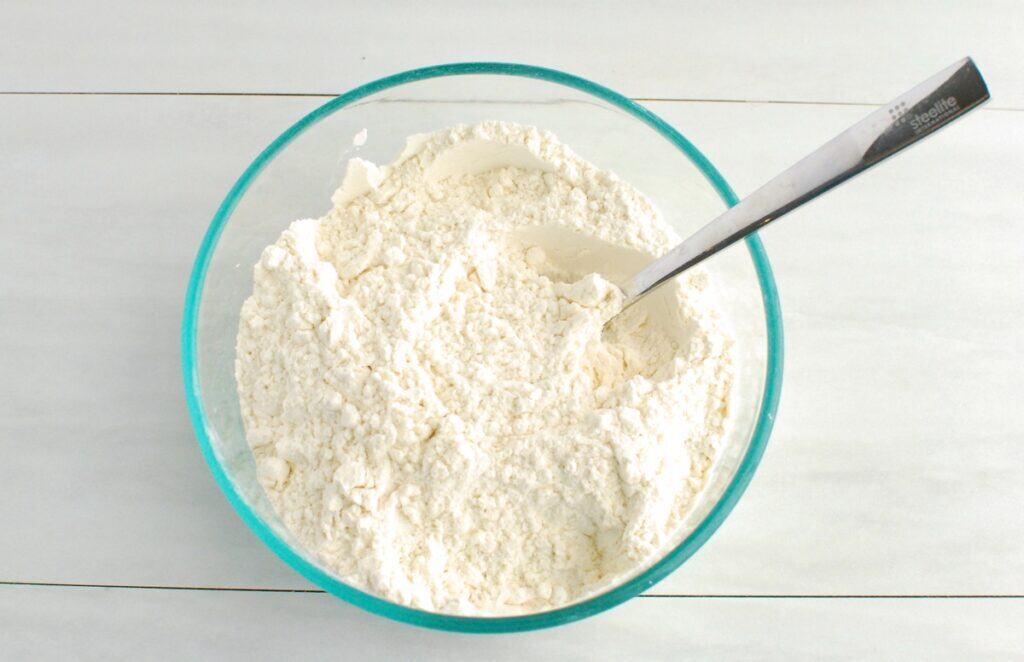
Start by combining the flour, baking soda, and salt in a mixing bowl.
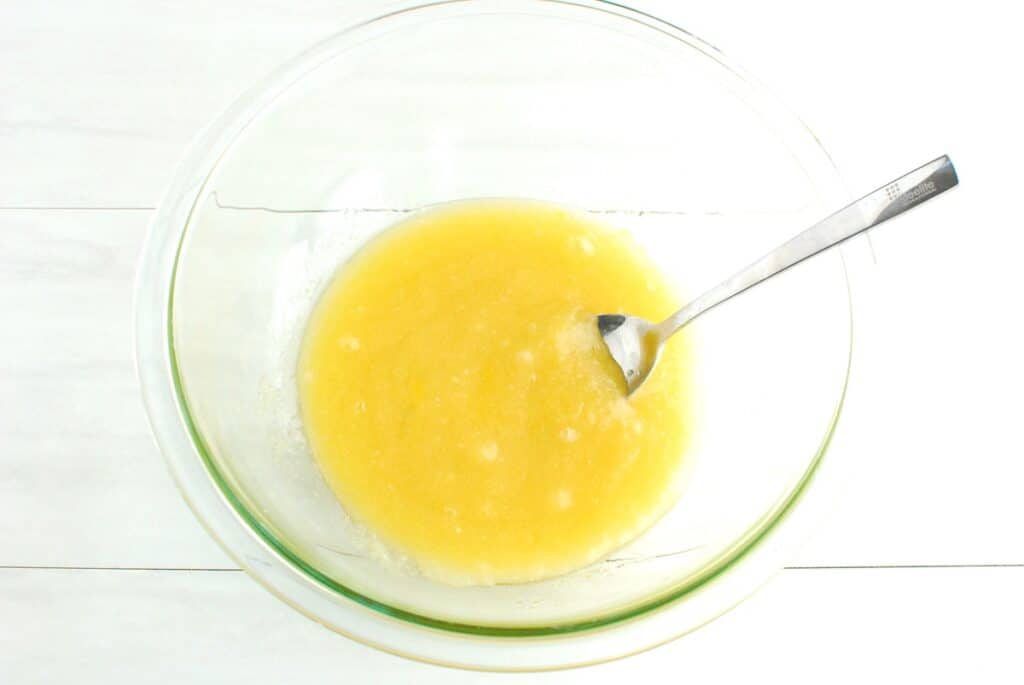
In another large mixing bowl, combine the sugar, olive oil, egg, and vanilla.
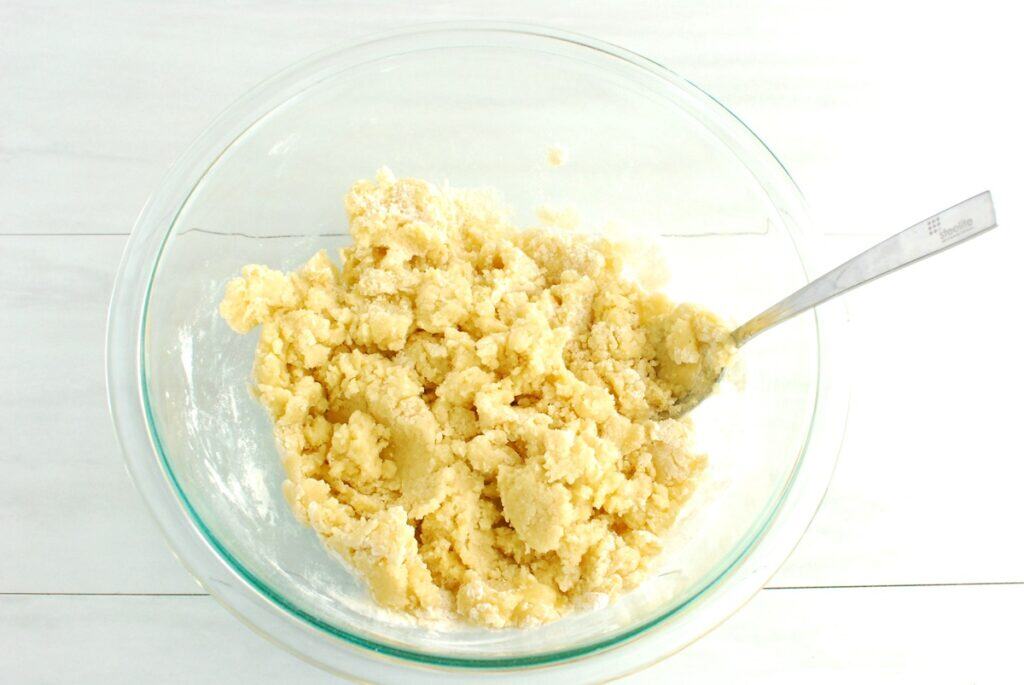
Add the dry ingredients to the wet ingredients and stir until combined.
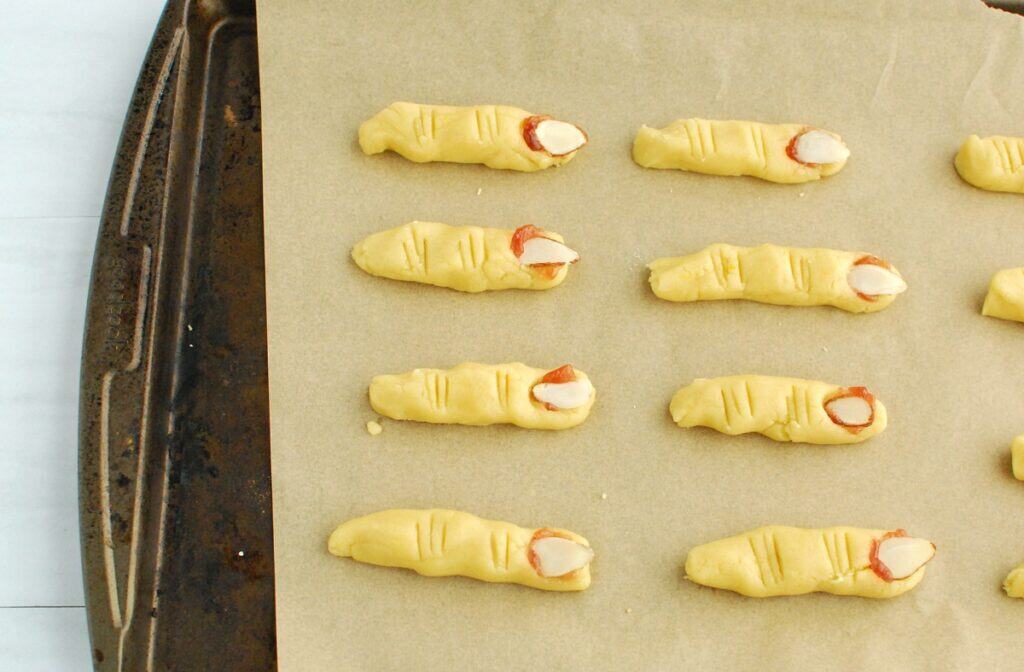
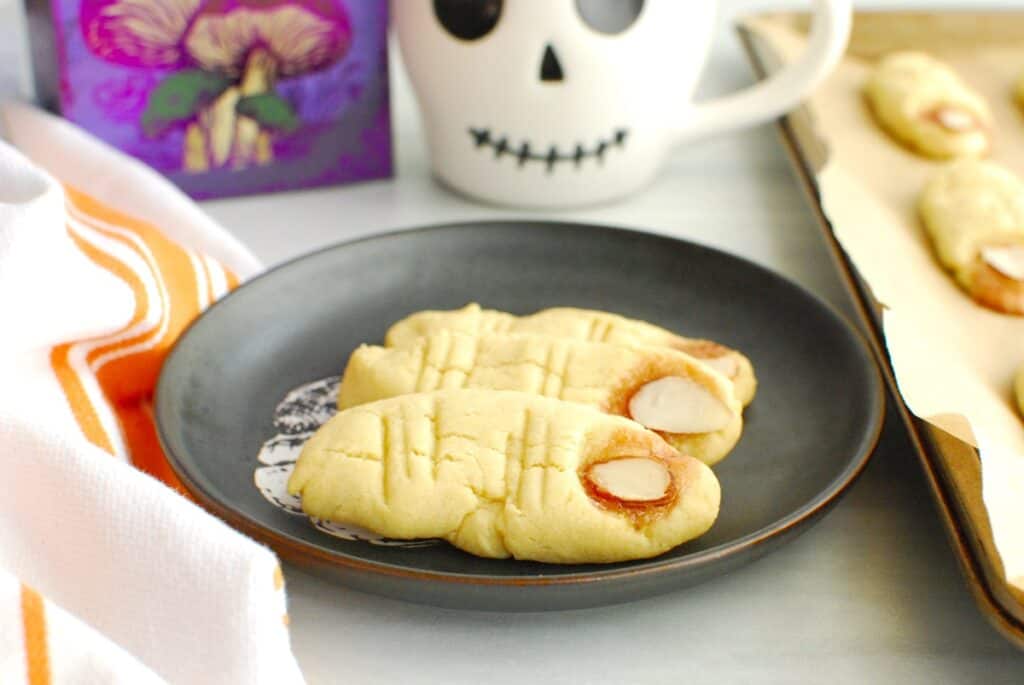
Use your hands to roll heaping tablespoons of dough into a thin log shape. Place them on parchment-lined baking sheets, and use a butter knife to create an indent at the end of each. Add a little dollop or raspberry jam, then press a sliced almond on top as the fingernail. Use a knife to cut a few lines behind the nail and a few further down the dough to look like knuckles.
I usually bake them at this point, but note that they do spread slightly. If you prefer the dough to retain a thinner log shape, you can chill the shaped dough for an hour prior to baking. I personally don’t mind that they spread a bit. My husband says they’re just chubby fingers. 😉
Bake ‘em at 350 degrees F for 10-12 minutes. The cookies should be turning a light golden brown at the bottom edge, and no longer look moist on top. Avoid overbaking, as they can dry out.
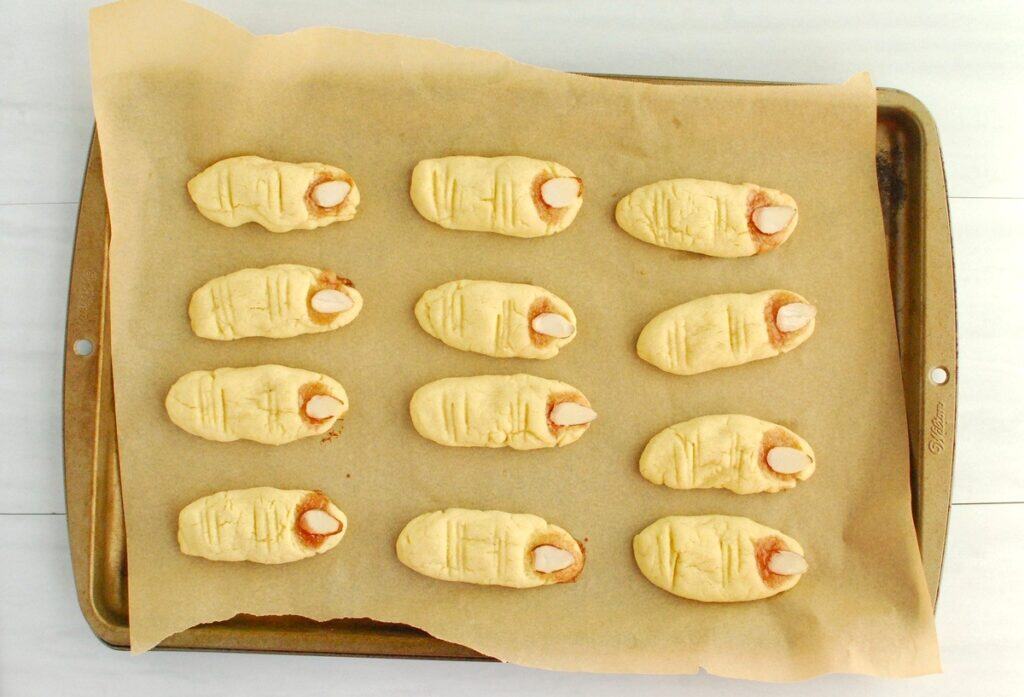
Let them cool on the pan, then enjoy! Leftover cookies can be stored in an airtight container at room temperature for up to 3-4 days, or can be frozen for longer storage. Use within 3 months of freezing for best quality, and just defrost at room temperature when ready to enjoy.
Allergens in this Recipe
Disclaimer: Always double check ingredients and labels yourself prior to making a recipe. While I try to check all ingredients for allergens, there’s always the chance I may miss something, or manufacturer formulations can change.
As written, this recipe is dairy free and soy free. (Double check the jam for dairy and soy if using uncommon brands or local options; occasionally these can be used as antifoaming agents).
This recipe does contain wheat/gluten (in the flour), egg (in the egg), and nuts (in the sliced almonds).
More Fun Halloween Recipes
If you’re looking for more Halloween recipes to make this season, be sure to give one of these a try:
- Chocolate pumpkin cookies with edible eyeballs
- Dairy-free Halloween cut out cookies
- Mummy hot dogs
- Monster muffins (with spinach and banana)
I hope you enjoy this recipe for olive-oil based Halloween finger cookies! If you get a chance to try it, please leave a recipe rating or comment below.

Halloween Finger Cookies
Ingredients
- 1 ½ cups all-purpose flour (spooned and leveled)
- ¼ teaspoon baking soda
- ¼ teaspoon salt
- ¾ cup granulated sugar
- ⅓ cup olive oil
- 1 large egg
- 1 teaspoon vanilla extract
- 24 sliced almonds
- 2 tablespoons raspberry jam (or any jam of your choice)
Instructions
-
Preheat the oven to 350 degrees F. Line two baking sheets with parchment paper.
-
In a mixing bowl, combine the flour, baking soda, and salt.
-
In another large mixing bowl, whisk together the sugar, olive oil, egg, and vanilla.
-
Add the dry ingredients to the wet ingredients and stir until combined.
-
Roll heaping tablespoons of dough into thin log shapes and place on the baking sheet. (Tip: If the dough is too crumbly when rolling, add an extra drizzle of olive oil to the bowl, then try again).
-
Press down the end of each one with the tip of a butter knife, then place a small dollop of raspberry jam in the indent. Press a sliced almond on top as the “fingernail”. Use a knife to cut a few lines behind the nail and a few further down the dough to look like knuckles.
-
Bake at 350 degrees F for 10-12 minutes, until cookies are turning a light golden brown at the edges. Let cool on the pan, then enjoy!
Recipe Notes
- If the dough is too crumbly, add an extra drizzle of olive oil. This can happen if the flour is packed into the measuring cup instead of spooned and leveled. The extra oil will help it hold together.
- If you prefer the dough to retain a thin log shape instead of spreading a bit, you can chill the shaped dough for an hour prior to baking. I don’t mind that they spread a bit. My husband says they’re just chubby fingers.
- Store at room temperature in an airtight container for up to 3-4 days.
Nutrition analysis (approximate per cookie): 91 calories, 3.5 g fat, 0.5 g saturated fat, 45 mg sodium, 14 g carbohydrate, 0.5 g fiber, 7 g sugar, 1 g protein, Vitamin D: 0%, Calcium: 0%, Iron: 3%, Potassium: 0%
Please pin this post to save for later and share with others. 🙂