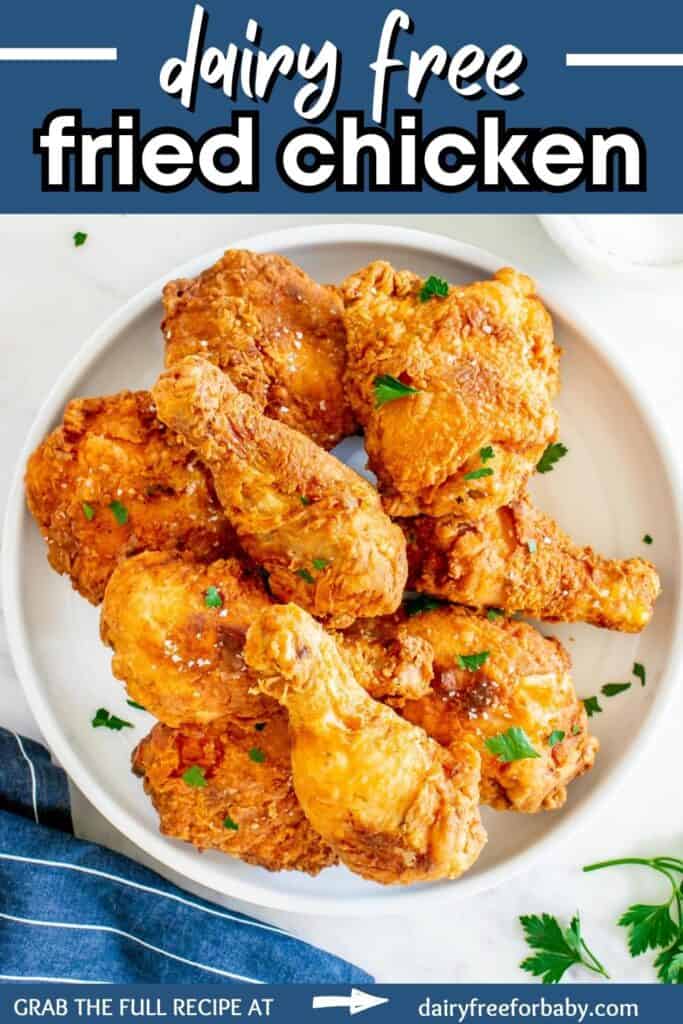
Craving a crunchy, mouth-watering piece of fried chicken – but following a dairy-free diet? Not to worry! We’ve got you covered with this delicious dairy free fried chicken recipe. Perfect for any family get together or just a fun dinner on the weekend. All you need are a handful of pantry staples, chicken, and a big pot to do your frying in. Let’s get cooking!
Ingredient Notes
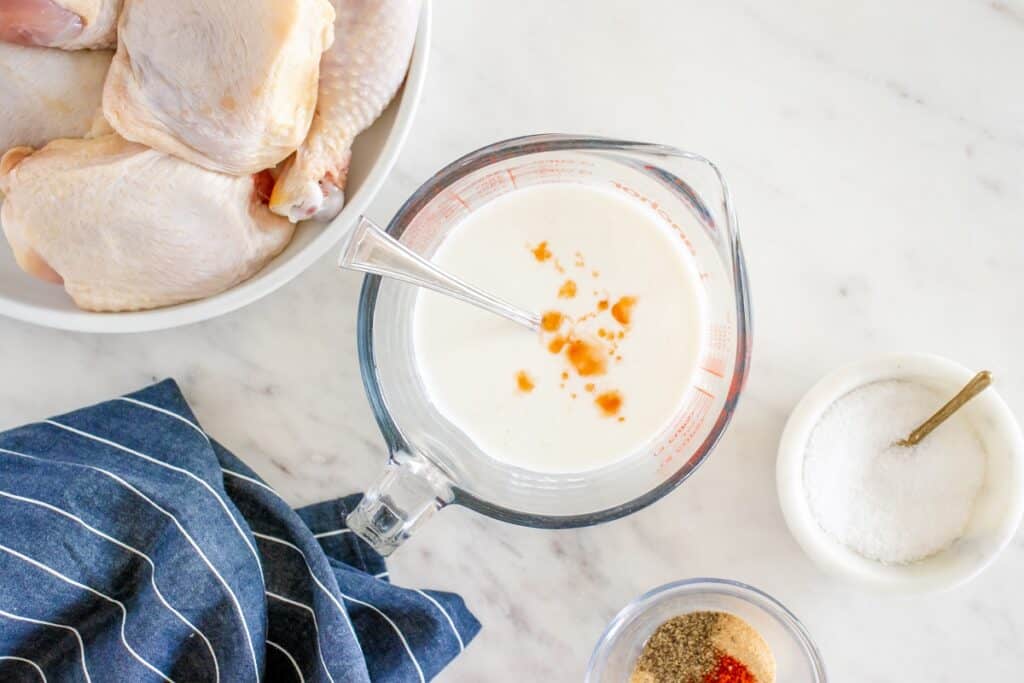
Here’s a photo of all the ingredients you’ll need, along with selected ingredient notes:
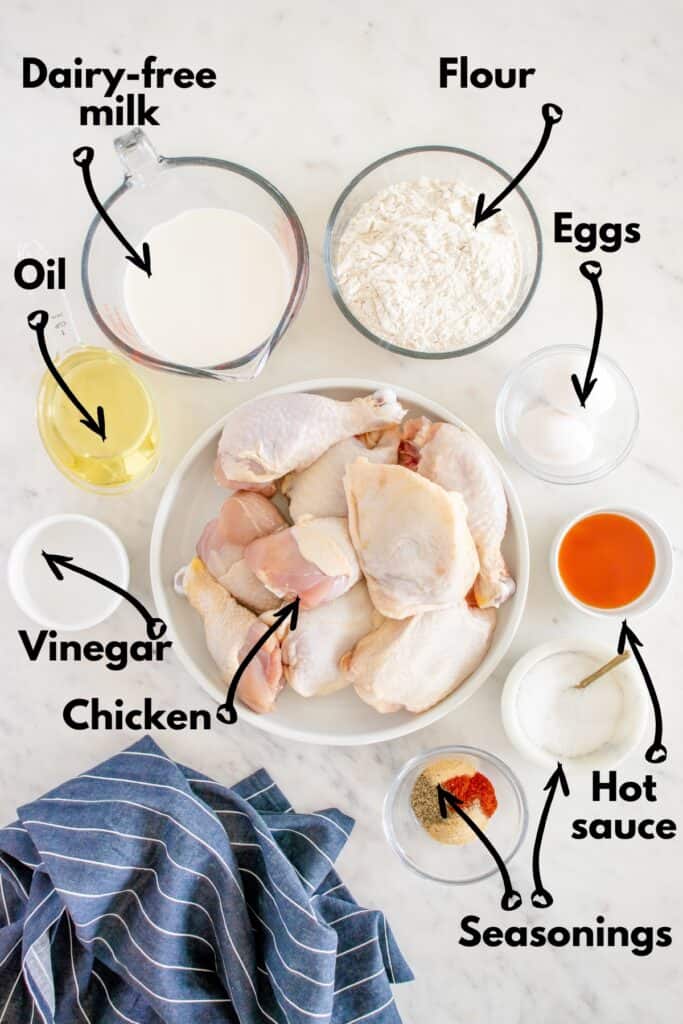
- Chicken – I like using a combination of drumsticks and thighs, but you can also just use one of these if you prefer a specific cut over the other.
- Egg whites – Using egg whites in the buttermilk mixture adds extra protein structure that helps the coating to stick to the chicken, ensuring it has the crispiest skin. (However, you can skip these and still have good results as long as you follow the recipe carefully.)
- Dairy-free milk – Plain oat milk or almond milk work well for this recipe. You could also use soy milk or pea protein milk. I do not recommend using coconut milk, as it imparts a coconut flavor in the final dish.
- Oil – Vegetable oil, canola oil, and avocado oil all have relatively high smoke points and work well for frying. Be sure to keep a close eye on the oil temperature so you don’t allow it to go too high and start smoking, which can lead to an acrid taste in the chicken.
Instructions
You’ll find the full recipe amounts and instructions in the recipe card below, but here’s a helpful overview with photos and tips.
Star by combining the dairy-free milk and vinegar in a large mixing bowl. Let that sit for about 5 minutes to form a dairy free “buttermilk”. If you notice the mixture break a little, don’t worry – that’s normal!
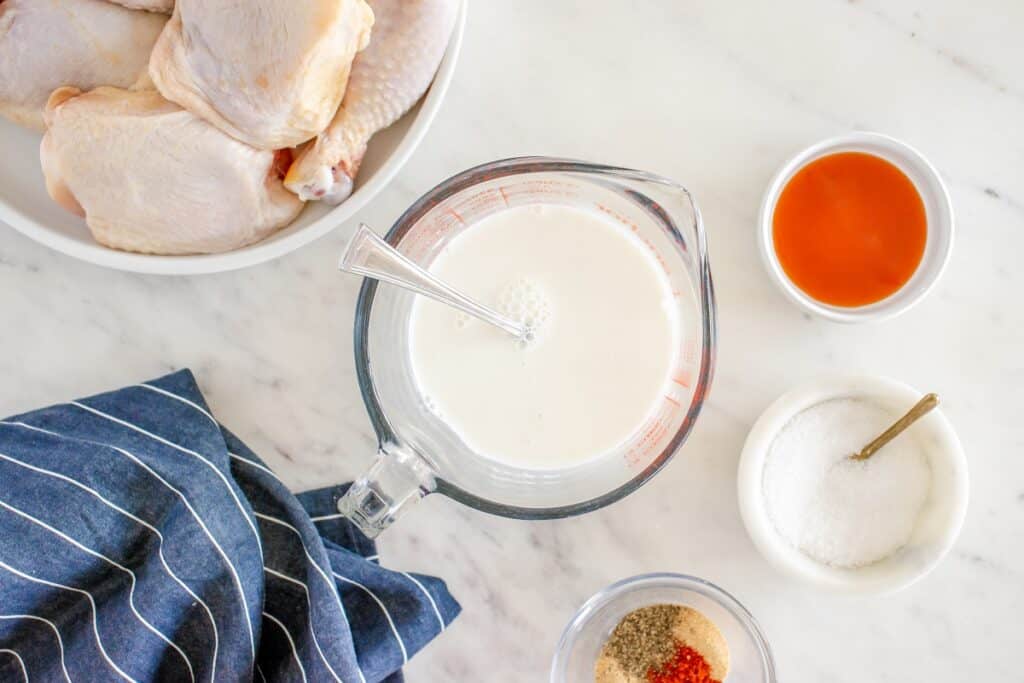
Whisk in the egg whites if you’re using ‘em, along with the hot sauce.
In another bowl, stir together the flour, salt, paprika, garlic powder, pepper, and onion powder. This will be your dredging mixture.

Season the chicken with a pinch of salt and pepper.
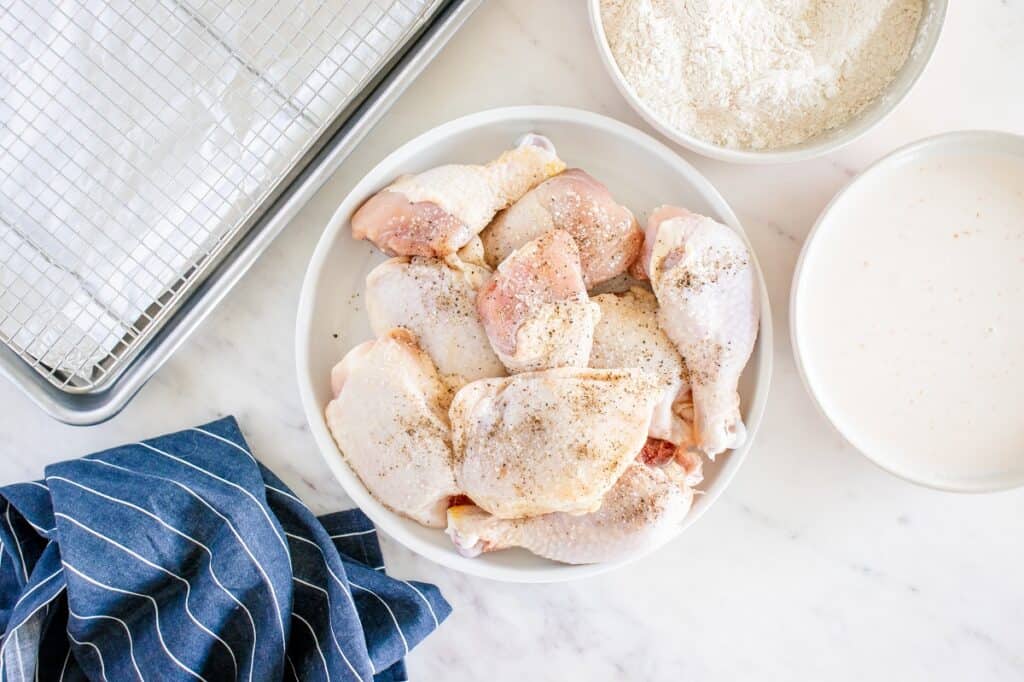
Working one at a time, you are going to do three steps: 1) Dip the chicken into the flour mixture, 2) Dip the chicken into the buttermilk mixture, then 3) Dip the chicken back into the flour mixture.
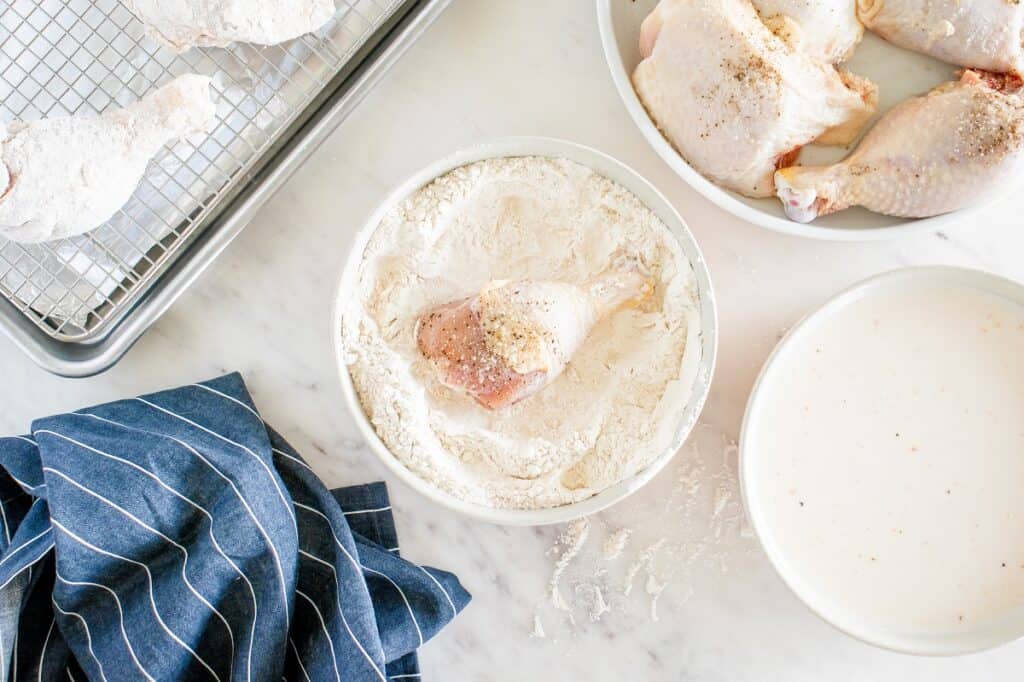
This “double dip” routine will give you the crispiest coating!
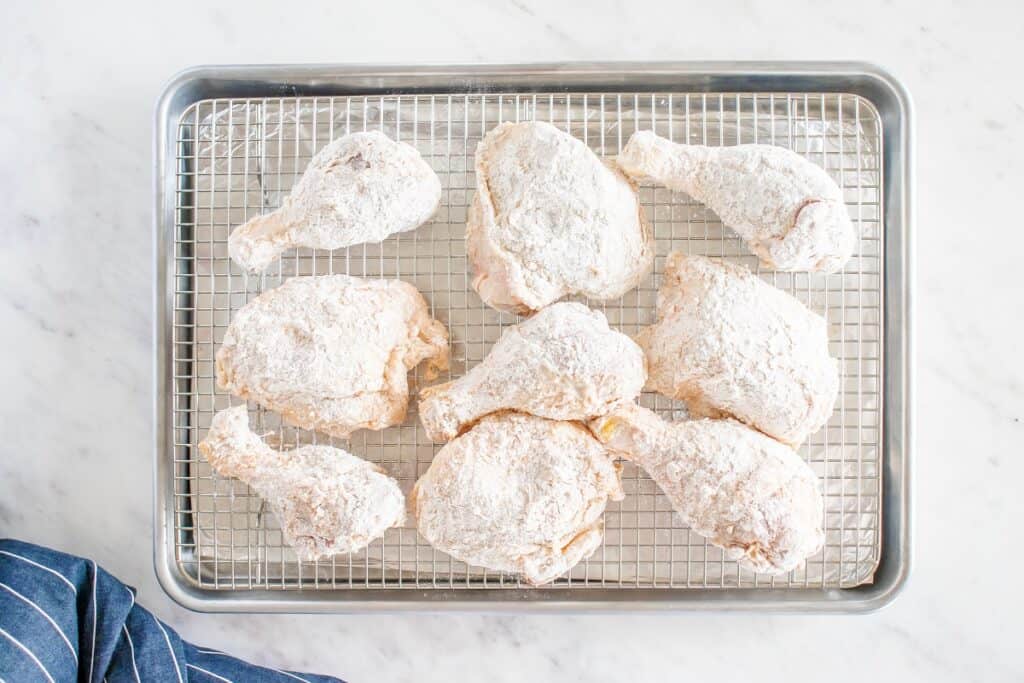
Set those aside on a wire rack for now while you heat the oil in the pot.
You want to the oil to reach a temperature of 350°F. It’s essential to get the temperature right, so I recommend using a thermometer. If you end up with a temperature too low, the chicken will be soggy. If you end up with a temperature too high, the outside can brown too much before the inside is cooked through.
Add a few pieces of chicken to the pot – as many as you can fit without overcrowding. Cook about 10 minutes, then flip and cook again for another 5-10 minutes. When the chicken reaches an internal temperature of 165 degrees F, you can pull them and set them aside on a paper-towel lined plate or baking sheet.
You’ll work in batches to cook the chicken, letting the oil temperature come back up to the right temperature between batches. (You can add more oil if needed between batches too).
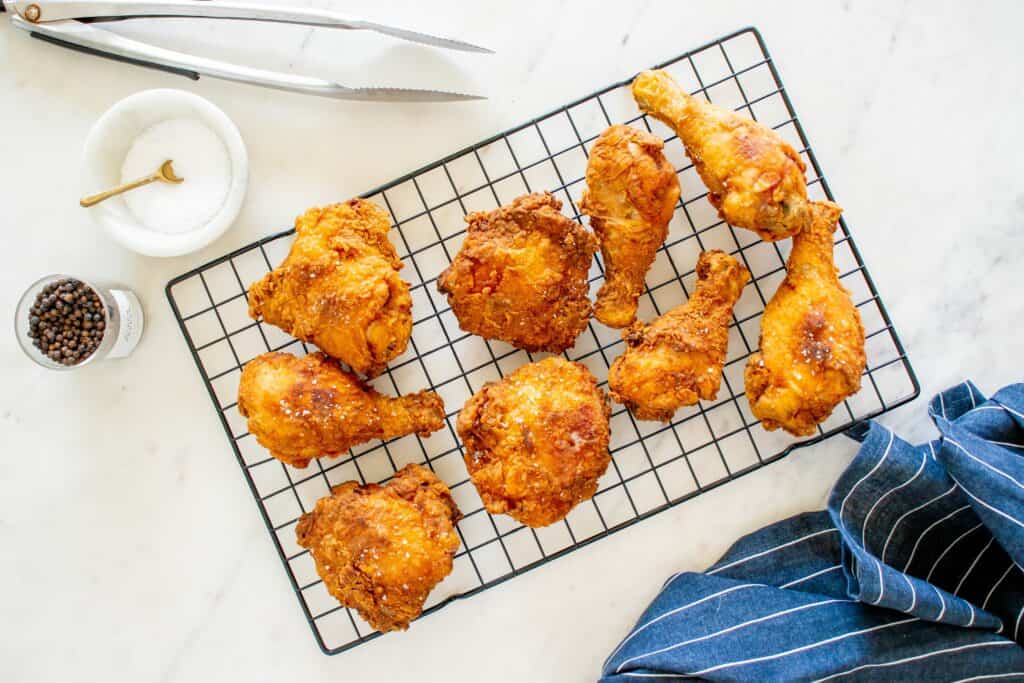
When all the chicken is done, it’s time to dig in! Of course, let ‘em cool for a few minutes first – no one likes burning their mouth on that first bite, haha.
Recipe FAQ
Here are some common questions that may come up as you’re preparing this recipe:
Bone-in chicken tends to have the best results, offering you that crispy outer layer and juicy inner meat. However, you can use boneless chicken if that’s what you prefer. You may need to adjust the cooking time for boneless chicken.
Leftovers can be stored in a container if the refrigerator for up to 4-5 days. Fried chicken is best reheated in the oven or air fryer to get the crispness back; if reheated in the microwave the outside will be soft.
If the coating is soggy after cooking, the oil temperature may have been too low or you may have overcrowded the pot.
Allergens in this Recipe
Disclaimer: Always double check ingredients and labels yourself prior to making a recipe. While I try to check all ingredients for allergens, there’s always the chance I may miss something, or manufacturer formulations can change.
As written, this recipe is dairy free.
This recipe does contain wheat/gluten (in the flour for dredging) and eggs (egg whites are optionally used in buttermilk mixture). You can adjust this as follows:
- To make wheat/gluten free: Use a gluten free all-purpose flour blend.
- To make egg free: Just leave the egg whites out of the buttermilk mixture. This can be done without much of an effect on the final result.
This recipe may contain nuts and soy depending on the products used for the dairy-free milk and frying oil. You can easily choose options that fit your needs – for example, avocado oil for frying and oat milk for the batter – to eliminate these two allergens.
Serving Suggestions
My favorite way to serve this is over dairy free Belgian waffles, topped with a little hot honey and maple syrup – chefs kiss right there!
You could also make this as your main dish and serve it alongside…
- Cucumber tomato salad
- Dairy free biscuits or crescent rolls
- Oil & vinegar coleslaw
- Twice baked potatoes
- Dairy free cornbread
I hope you enjoy this tasty dairy free fried chicken. I mean, it doesn’t get much better than fried chicken, am I right?! 😉 If you get a chance to try this, feel free to leave a recipe rating or comment below.

Dairy Free Fried Chicken
Ingredients
- 2 cups unsweetened non-dairy milk (i.e. oat milk or plain almond milk)
- 2 tablespoons distilled vinegar
- 2 egg whites (optional, but can help the coating stick better)
- 1 tablespoon hot sauce
- 2 cups all-purpose flour
- 1 teaspoon salt (plus an extra pinch for seasoning the chicken directly)
- 1 teaspoon paprika
- 1 teaspoon garlic powder
- ½ teaspoon black pepper (plus an extra pinch for seasoning the chicken directly)
- ½ teaspoon onion powder
- 4 skin-on bone-in chicken drumsticks
- 4 skin-on bone-in chicken thighs
- Oil, for frying (vegetable oil, canola oil, or avocado oil)
Instructions
-
In a large mixing bowl, combine the non-dairy milk and vinegar. Let sit for about 5 minutes; this will create a dairy free “buttermilk” (you may see the mixture break; this is normal). Whisk in the egg whites (if using) and hot sauce.
-
In another mixing bowl, stir together the flour, salt, paprika, garlic powder, pepper, and onion powder.
-
Sprinkle a pinch of salt and pepper on the chicken. Working one at a time, dip the chicken in the flour mixture and shake off excess flour. Dip into the buttermilk mixture, then dip back into the flour mixture to thoroughly coat the chicken. Set aside on a wire rack for now.
-
Add the oil to a pot over medium heat until the oil is a few inches deep (so it will cover most of the chicken while frying). Monitor the temperature of the oil until it reaches 350°F (it should take about 5-10 minutes; do not heat higher than 350°F).
-
Add several pieces of chicken to the pot, being careful not to overcrowd the pot. Cook the chicken for 10 minutes, then flip and cook for an additional 5-10 minutes, until a thermometer confirms the internal temperature of the chicken has reached 165°F. Remove the chicken from the oil using tongs, and place on a paper towel lined plate to absorb excess oil.
-
Let the remaining oil in the pot heat back up to 350°F, adding extra oil if needed. Repeat the cooking process with the remaining pieces of chicken.
-
Cool a few minutes before serving. Enjoy!
Recipe Notes
- Vegetable oil, canola oil, and avocado oil all have relatively high smoke points and are good options for frying. I do not recommend using other types of oil for this recipe.
- Using a thermometer to determine the temperature of the oil, as well as the temperature of the cooked chicken, is an essential step in getting this recipe right. If the oil is too hot, the outside will burn before the inside is cooked. If the oil is too cool, the coating will not crisp up properly.
Nutrition analysis (**approximate per serving; note that we have estimated around 50% of the dredging liquid and flour mixture was used and estimated around 20% oil absorption from 2 cups of oil; these numbers may be inaccurate): 453 calories, 31 g fat, 6 g saturated fat, 480 mg sodium, 14 g carbohydrate, 0.5 g fiber, 1 g sugar, 30 g protein, Vitamin D: 3%, Calcium: 4%, Iron: 10%, Potassium: 7%
Feel free to pin this post to save for later!
If you need a dairy free friend chicken recipe this is it! I Tried this recipe out for a friend who’s highly allergic to the casein in milk so I used the oatmilk and vinegar as directed and it turned out AMAZING! You couldn’t even tell the chicken fried chicken wasnt made with Buttermilk. I used peanut oil for frying and made sure it was exactly 350° before adding the chicken. Thank you so much for an amazing recipe!
Thank you for such a kind review! I’m so glad you and your friend enjoyed the recipe. This is definitely one of my personal favorites too. 🙂