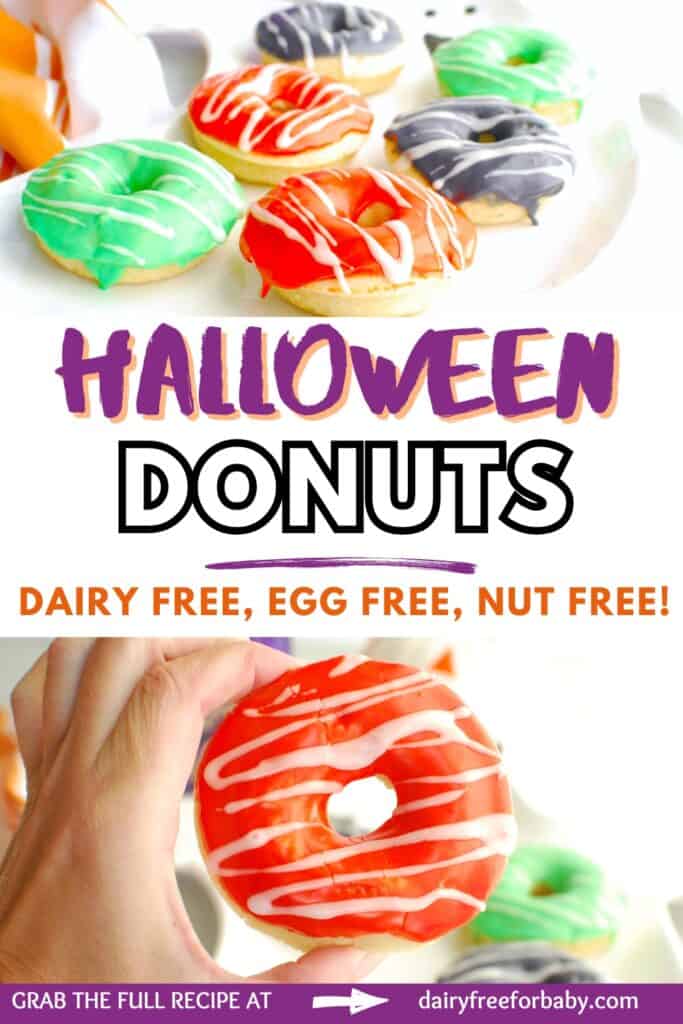
Get ready for spooky season with these fun baked Halloween donuts! Soft, fluffy, and delicious, these are easy to make with standard ingredients. Plus, they’re naturally dairy-free, egg-free, and nut-free, making them a great allergy-friendly option for kiddos with those needs.
Ingredients
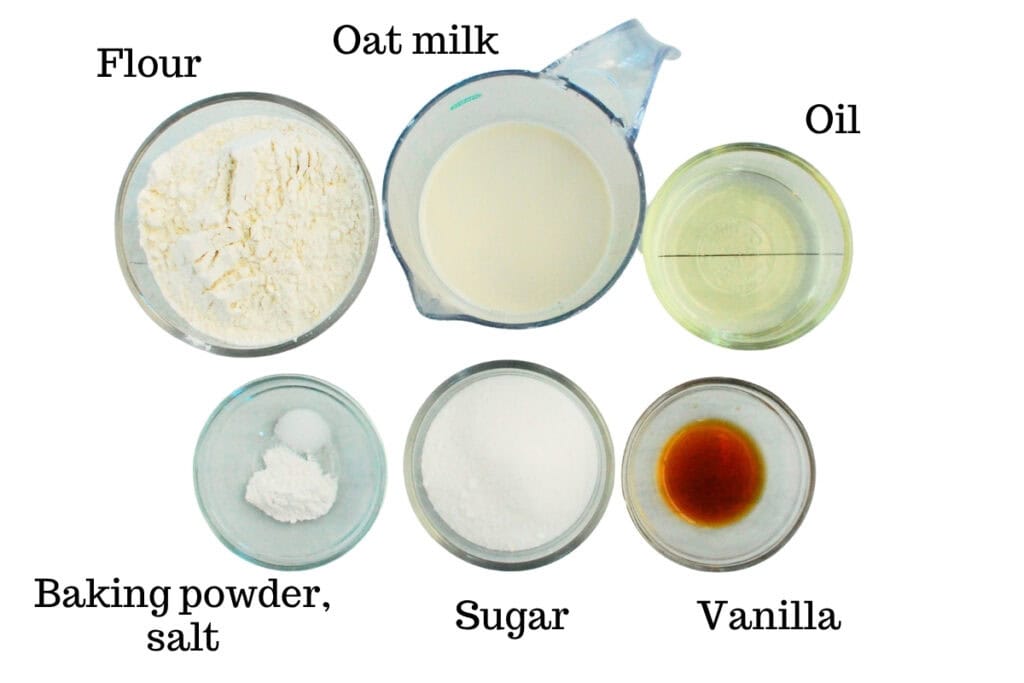
Here’s a photo of everything you need to make the baked donuts:
And here’s what you’ll need for the icing:

A few helpful ingredient notes:
- Oat milk – This is a dairy-free website, so I recommend using extra creamy oat milk for these donuts for the best taste and texture. However, you can use any milk alternative you prefer (and if you are not dairy-free, you can obviously use regular milk instead).
- Vegetable oil – I like this as the fat source in the donuts since it’s inexpensive and readily available in almost everyone’s kitchen. However, if you’re not a vegetable oil fan, you can easily substitute with another neutral oil like avocado oil.
Instructions
You’ll find the full recipe amounts and instructions at the recipe card at the bottom of the post, but here’s a helpful overview with process photos and tips.
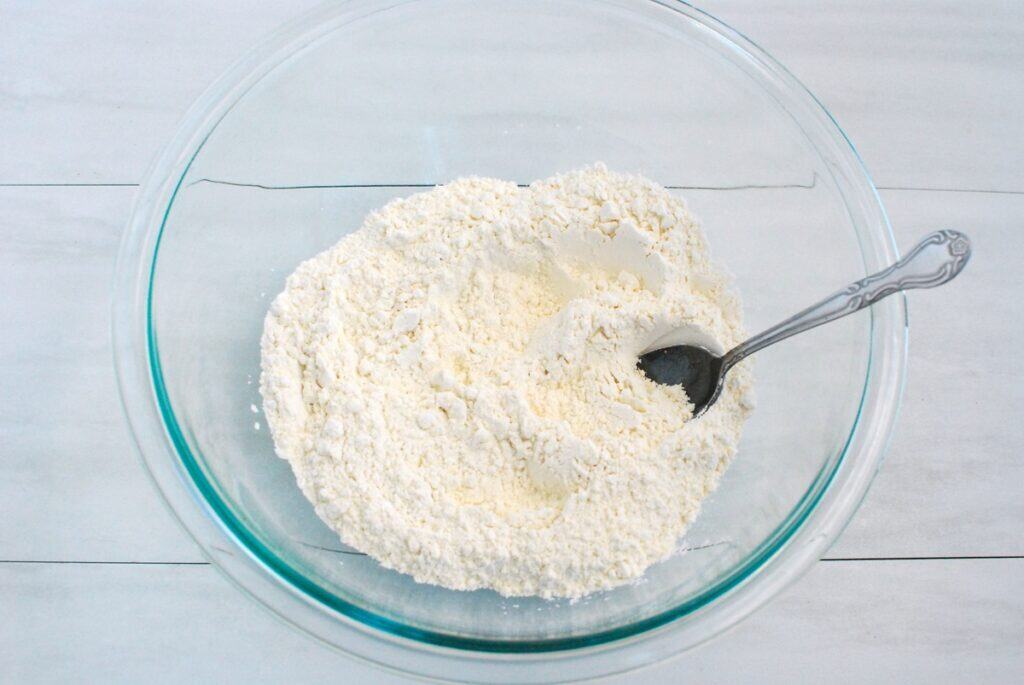
Start by mixing together the dry ingredients for the donuts: flour, sugar, baking powder, and salt.
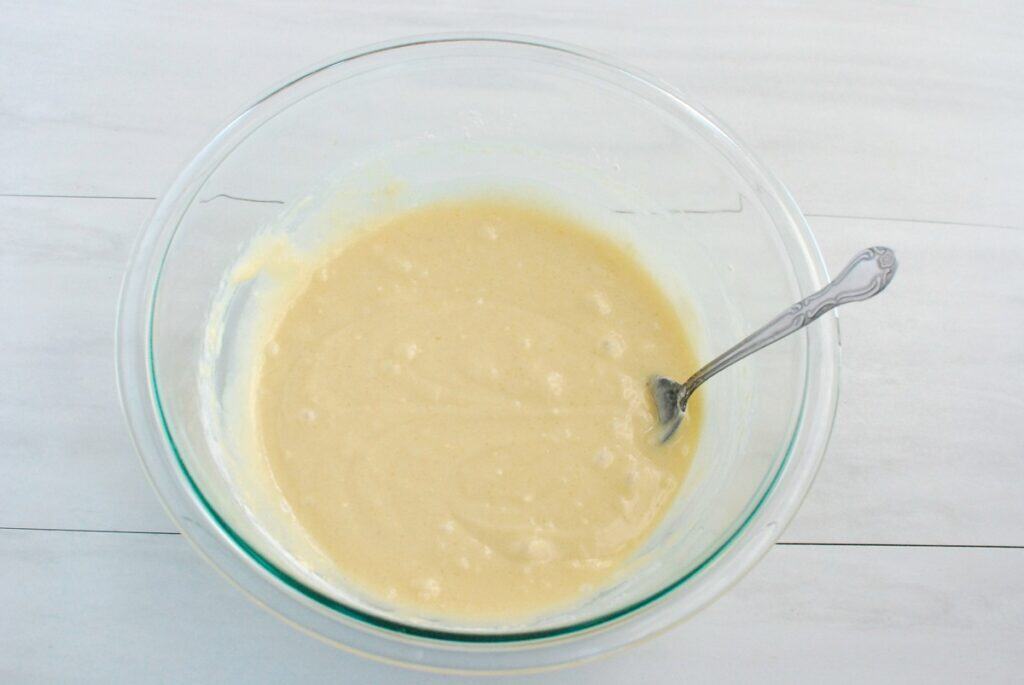
Add the oat milk, vegetable oil, and vanilla. Stir well to combine.
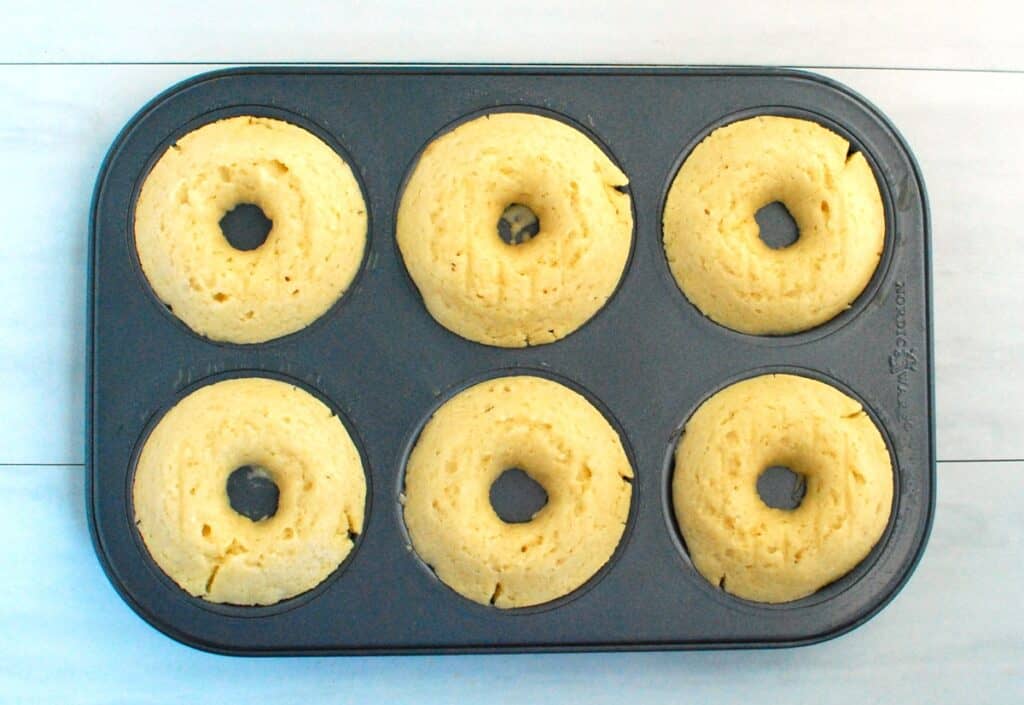
Pour that in a greased 6-count donut tin, and bake at 350 degrees F for about 10-12 minutes. The donuts will remain a relatively light golden color, but a toothpick will pull out clean from the donut when they are fully cooked. Avoid overbaking or they can dry out.
Let them cool in the pan for 5 minutes, then remove to a cooling rack. As they’re cooling in the pan, make the icing.
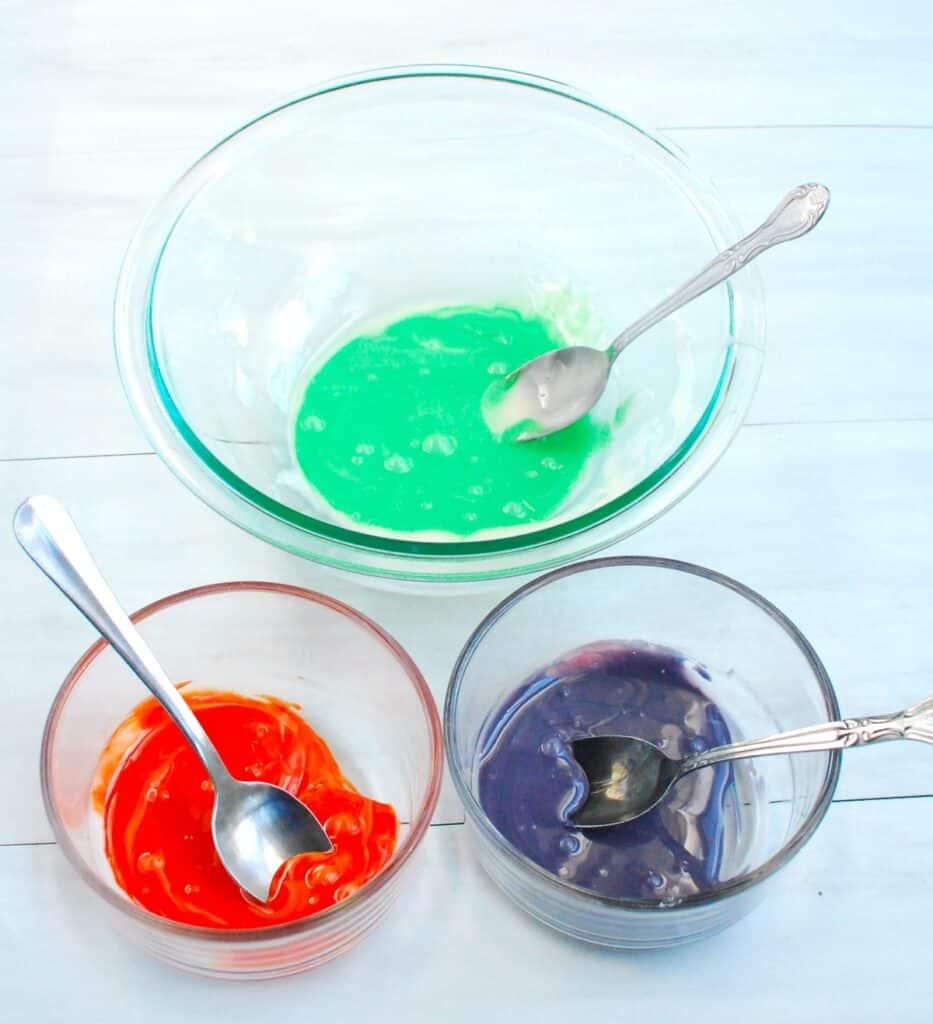
Combine the powdered sugar, oat milk, and vanilla in a bowl. If the icing seems too thin, add some extra powdered sugar. If it seems too thick, add extra oat milk.

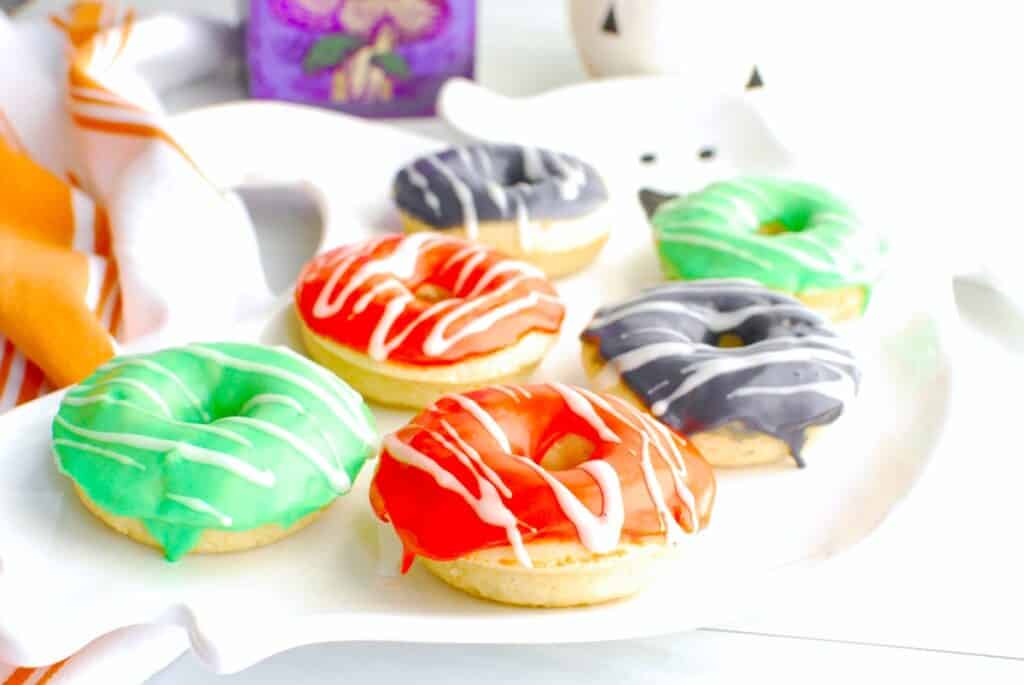
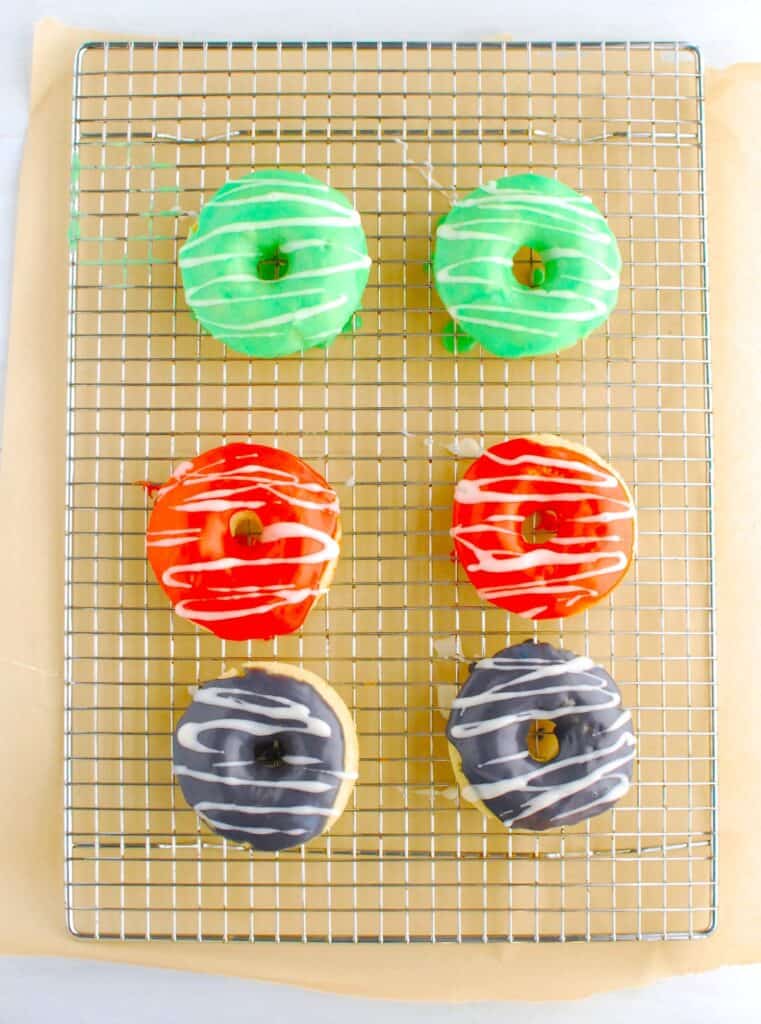
If you plan to use fun Halloween colors, you can divide the icing between a couple bowls, depending on how many colors you plan to use. I recommend 1 to 3 colors if you want to do this, because if you try to do more colors, it can be tough to get enough icing in each bowl to be able to dip the donuts. Add the food coloring to the bowls to create the colors you want – obviously I used a dark purple, orange, and green.
While the donuts are still slightly warm, dip them in the icing, then return to the cooling rack to allow the icing to set. Put a piece of parchment paper under the cooling rack ahead of time to catch any drips!
I like to drizzle them with more white icing after the first layer dries for a “spiderweb” like look, but you could also put on Halloween sprinkles too. (If you use sprinkles, put them on immediately after you add the icing so that they stick.)
Recipe FAQ
Store in an airtight container or on a plate covered with tin foil for up to 2-3 days.
Yes. Freeze unfrosted for up to 3 months (for best quality). Defrost at room temperature, then prepare and add icing.
As long as you use the appropriate sugar (i.e. sugar that’s not processed with bone char) and food coloring that is vegan-friendly, these are already vegan!
Allergens in this Recipe
Disclaimer: Always double check ingredients and labels yourself prior to making a recipe. While I try to check all ingredients for allergens, there’s always the chance I may miss something, or manufacturer formulations can change.
As written, this recipe is dairy-free, egg-free, and nut-free.
This recipe does contain wheat/gluten in the flour, and also contains vegetable oil which is derived from soy (it is highly refined, but most people with soy allergies avoid this). I have not tested a substitute for the wheat/gluten, but you can easily make these soy-free by using another neutral oil. Also, double check that your food coloring does not contain soy.
More Halloween Treats
If you’re looking for more fun Halloween treats for the kiddos – or for yourself! – here are a few options:
- These Halloween cut out sugar cookies are super fun for baking and decorating with the kiddos.
- Whip up mummy hot dogs when you want an easy but festive Halloween dinner option.
- Make a Halloween cookie cake to serve to a crowd – low fuss and easy to make.
- Try creepy finger cookies for a silly and spooky option, made with olive oil instead of butter!
- Green “monster muffins” are made with spinach and banana for a fun Halloween breakfast or snack.
I hope you get a chance to try these Halloween donuts! If you do, would love for you to leave a recipe rating or comment below.

Baked Halloween Donuts
Ingredients
For the donuts:
- 1 ¼ cup all-purpose flour
- ½ cup granulated sugar
- 1 teaspoon baking powder
- ¼ teaspoon salt
- ⅔ cup extra-creamy oat milk (or any milk you prefer)
- 3 tablespoons vegetable oil (or any neutral oil)
- 1 teaspoon vanilla extract
For the icing:
- 1 ½ cups powdered sugar
- 2 ½ tablespoons extra-creamy oat milk (or any milk you prefer)
- ½ teaspoon vanilla extract
- Food coloring in Halloween colors (optional; 1-3 colors if desired)
Instructions
-
Preheat the oven to 350 degrees F. Grease a six-count donut pan.
-
In a large bowl, combine the flour, sugar, baking powder, and salt. Stir well.
-
Add the oat milk, oil, and vanilla. Stir until combined.
-
Spoon or pour the batter carefully into the donut pan. Bake at 350 degrees F for 10-12 minutes, or until a toothpick pulls clean from the baked donut.
-
Let cool in the pan for 5 minutes, then remove to a cooling rack placed over a piece of parchment paper.
-
Meanwhile, make the icing. Combine the powdered sugar, oat milk, and vanilla in a medium mixing bowl. Divide into separate bowls and add food coloring to each bowl to create any colors you’d like for the frosting. Leave a small bowl with a little white icing if you want to drizzle lines on the donuts (as pictured).
-
Dip the slightly-warm donuts into the icing, then return to the cooling rack (the parchment underneath will catch any drips). Allow to cool fully and let the icing set. If desired, drizzle with white icing over the initial set icing, then allow to set again. Enjoy!
Recipe Notes
- I would use at max 3 different colors, which will give you enough to do two donuts in each color. If you try to divide into more bowls with more colors, it can be tough to get enough icing in the bowl to dip the donuts.
- If the icing seems too thin, add some extra powdered sugar. If it seems too thick, add extra oat milk.
- The icing will firm up but will not solidify completely on top. As such, it’s best not to stack these donuts when transporting them.
- Store in an airtight container or on a plate covered with tin foil for up to 2-3 days.
- If making these as a vegan option, ensure that the sugar and food coloring you choose are not processed with any animal ingredients (for example, while regular sugar may be processed with bone char, organic granulated sugar is not and would thus be vegan friendly).
- The nutrition analysis below assumes approximately 75-80% of the icing will be used – some will be left behind in the bowls after dipping.
Nutrition analysis (approximate per donut): 332 calories, 8 g fat, 1 g saturated fat, 200 mg sodium, 62 g carbohydrate, 1 g fiber, 40 g sugar, 3 g protein, Vitamin D: 1%, Calcium: 7%, Iron: 9%, Potassium: 2%
Sharing is caring – please pin this post to share with others (and save for yourself!). 🙂